SwiftUI1:系统Modifier和自定义Modifier
SwiftUI1:系统Modifier和自定义Modifier
参考:
- HackingWithSwift
- [SwiftUI 知识碎片] Debris-13 环境 Modifier
- [SwiftUI 知识碎片] Debris-15 自定义 modifier
- StudyModifier.swift
一、 SwiftUI里的系统定义的Modifier
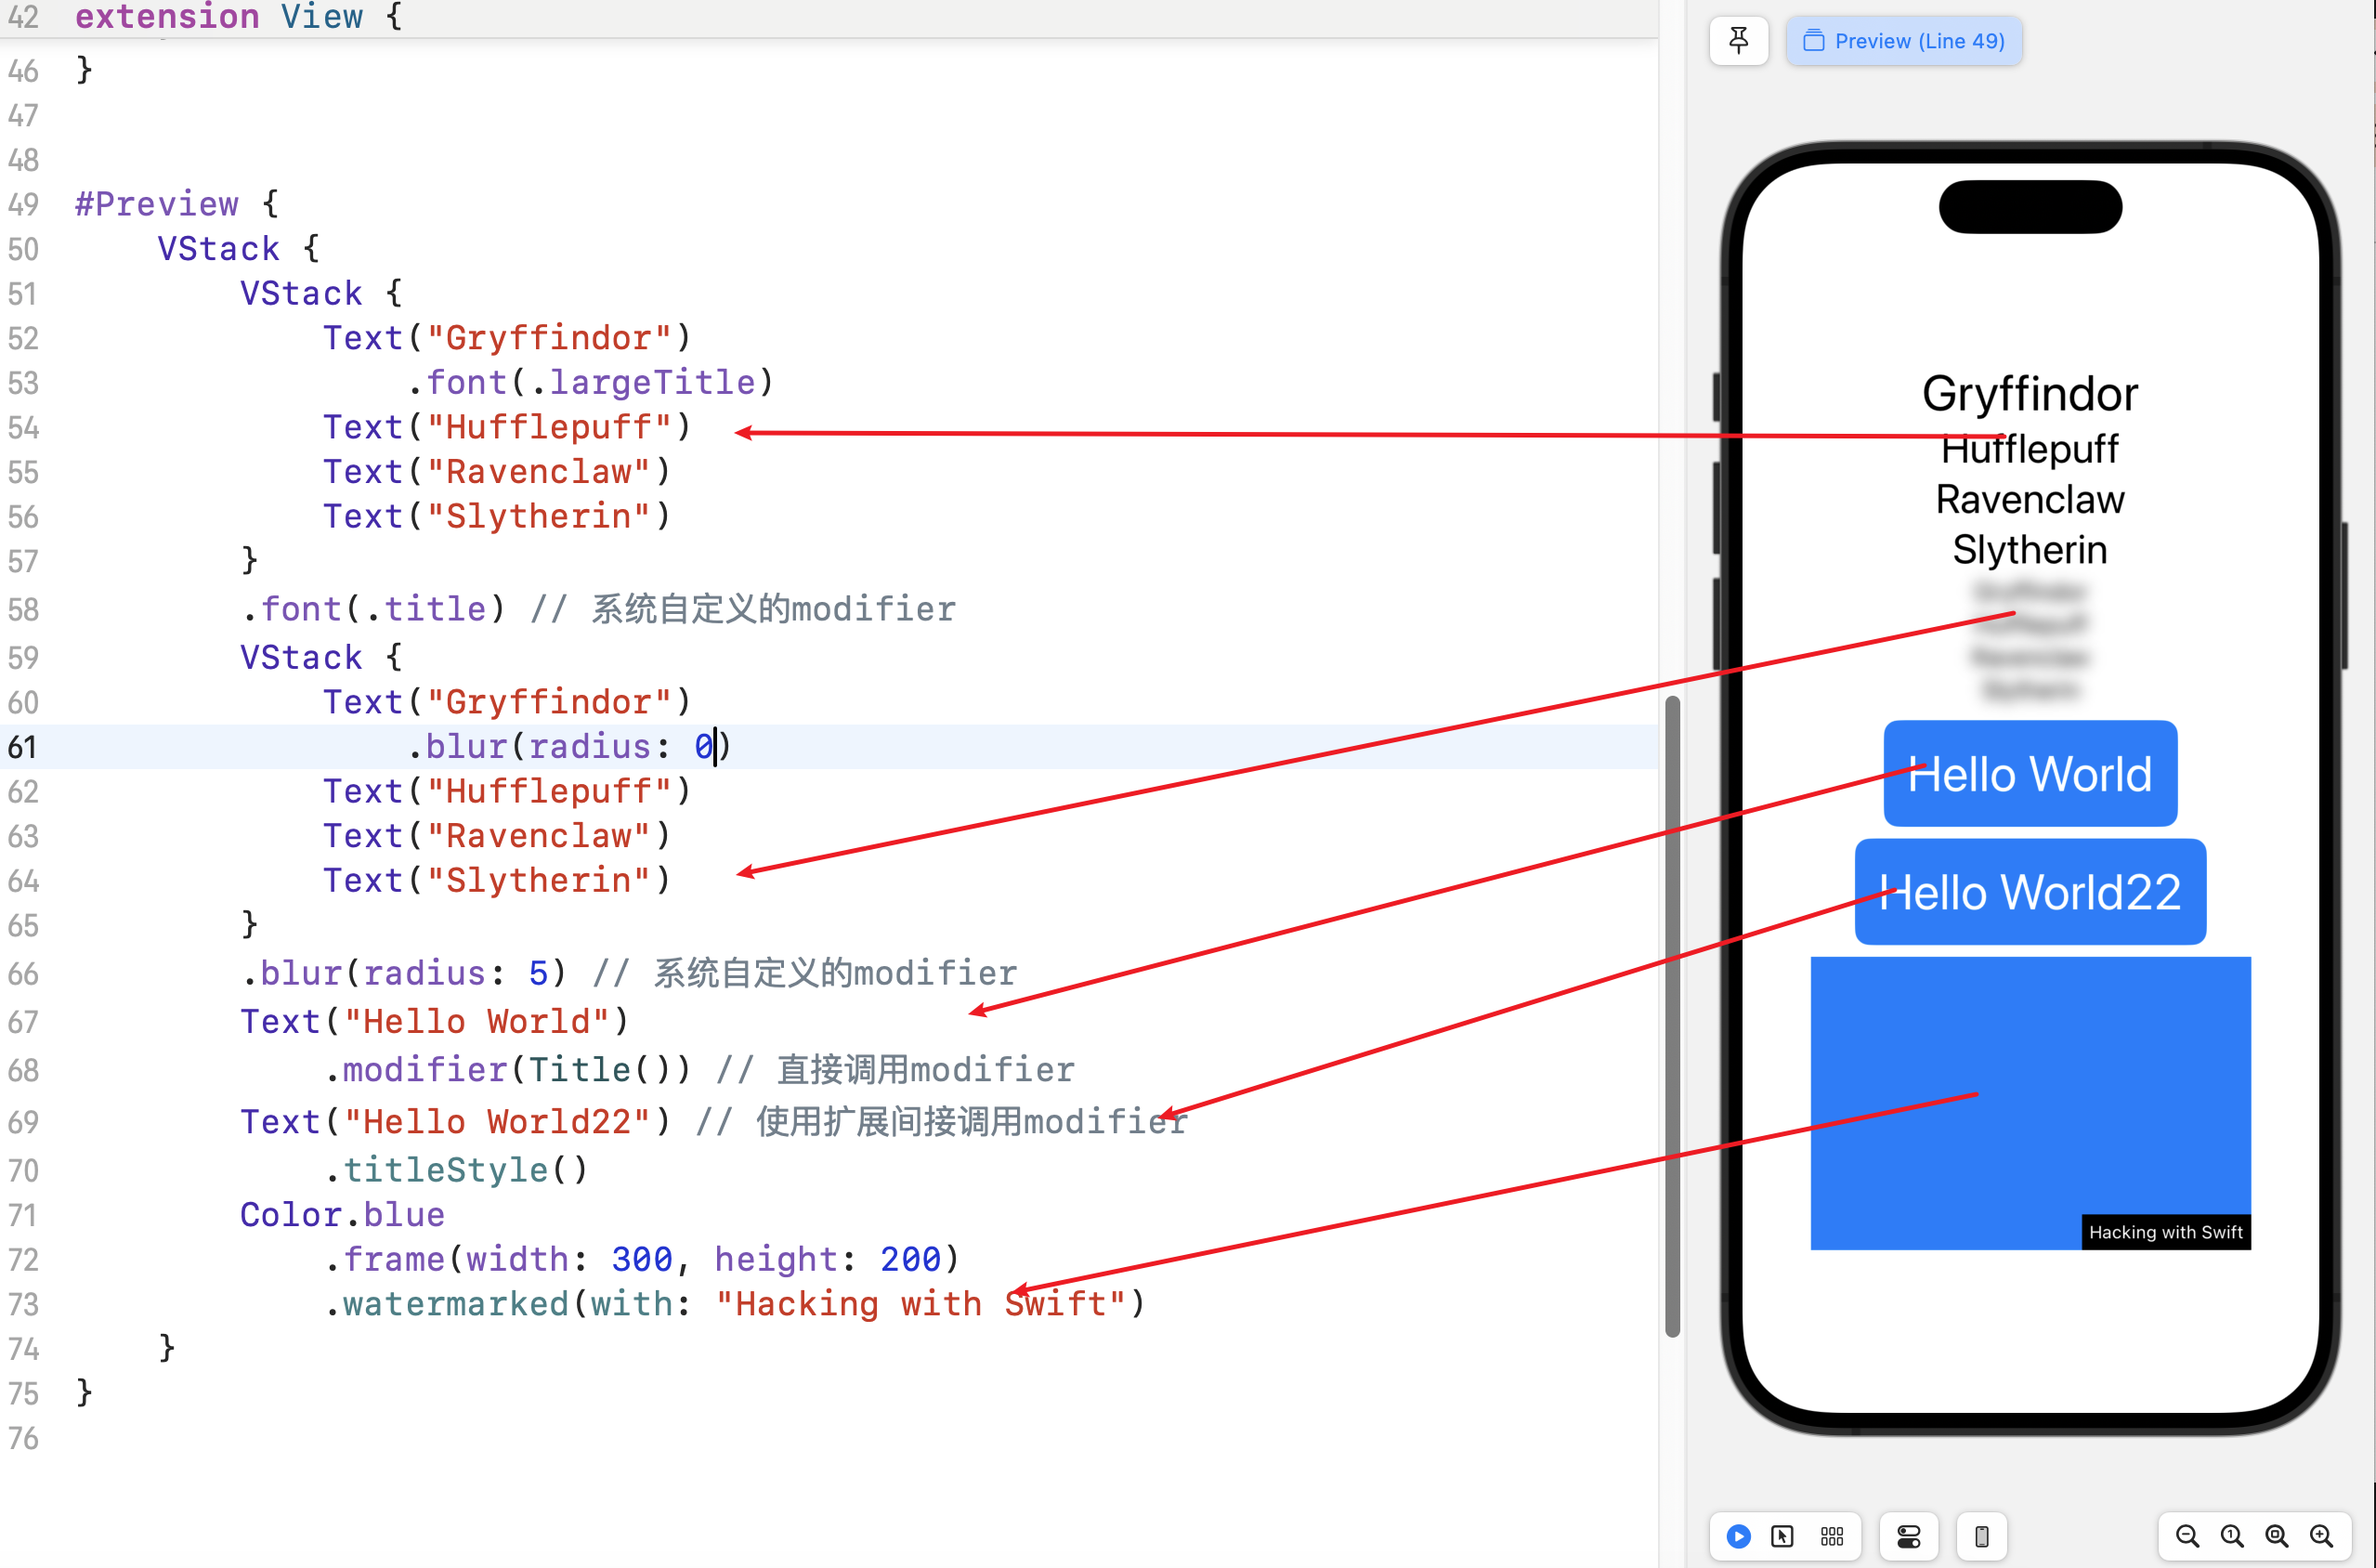
1.1 子控件可优先级更高的Modifier,也就是子父控件和子控件同时设置,子控件优先级更高
1
2
3
4
5
6
7
8
VStack {
    Text("Gryffindor")
        .font(.largeTitle)
    Text("Hufflepuff")
    Text("Ravenclaw")
    Text("Slytherin")
}
.font(.title)
1.2 子控件可优先级更高的Modifier,也就是子父控件和子控件同时设置,子控件优先级更高
1
2
3
4
5
6
7
8
9
VStack {
    Text("Gryffindor")
        .blur(radius: 0)
    Text("Hufflepuff")
    Text("Ravenclaw")
    Text("Slytherin")
}
.blur(radius: 5)
二、 SwiftUI里的自定义的Modifier
自定义需要自定义一个结构体,该结构体继承ViewModifier,在body里返回一个view对象
1
2
3
4
5
struct XXX: ViewModifier {
    func body(content: Content) -> some View {
        // ...
    }
}
Demo2.1: 只是修改原view的属性
1
2
3
4
5
6
7
8
9
10
11
12
13
14
15
16
17
18
19
20
21
22
23
24
25
26
27
struct Title: ViewModifier {
    func body(content: Content) -> some View {
        content
            .font(.largeTitle)
            .foregroundColor(.white)
            .padding()
            .background(Color.blue)
            .clipShape(RoundedRectangle(cornerRadius: 10))
    }
}

// 为了方便使用可以添加分类
extension View {
    func titleStyle() -> some View {
        self.modifier(Title())
    }
}

// 调用Demo
VStack {
        Text("Hello World")
            .modifier(Title()) // 直接调用modifier
        Text("Hello World22") // 使用扩展间接调用modifier
            .titleStyle()
    }

//
Demo2.2: 返回一个新的view
1
2
3
4
5
6
7
8
9
10
11
12
13
14
15
16
17
18
19
20
21
22
23
24
25
26
struct Watermark: ViewModifier {
    var text: String

    func body(content: Content) -> some View {
        // 这里返回的是一个新的view
        ZStack(alignment: .bottomTrailing) {
            content
            Text(text)
                .font(.caption)
                .foregroundColor(.white)
                .padding(5)
                .background(Color.black)
        }
    }
}

extension View {
    func watermarked(with text: String) -> some View {
        self.modifier(Watermark(text: text))
    }
}

// 调用Demo
Color.blue
    .frame(width: 300, height: 200)
    .watermarked(with: "Hacking with Swift")
This post is licensed under CC BY 4.0 by the author.
