Swift Package Manage使用及自定义
参考:
- Swift Package Manager 使用
- iOS包依赖管理工具(五):Swift Package Manager(SPM)自定义篇
- SwiftUI中文入门
- SwiftUI_learning01
- swiftui-state-property-binding-stateobject-observedobject-environmentobject-學習筆記
前言
最近在接入亚马逊人脸识别时,亚马逊提供的最新SDK是使用
Swift Package Manage管理的,而项目里使用的其他三方SDK是使用cocoa pods进行管理,一开始以为两个不能兼容,但是经过实际测试,是可以正常一起使用
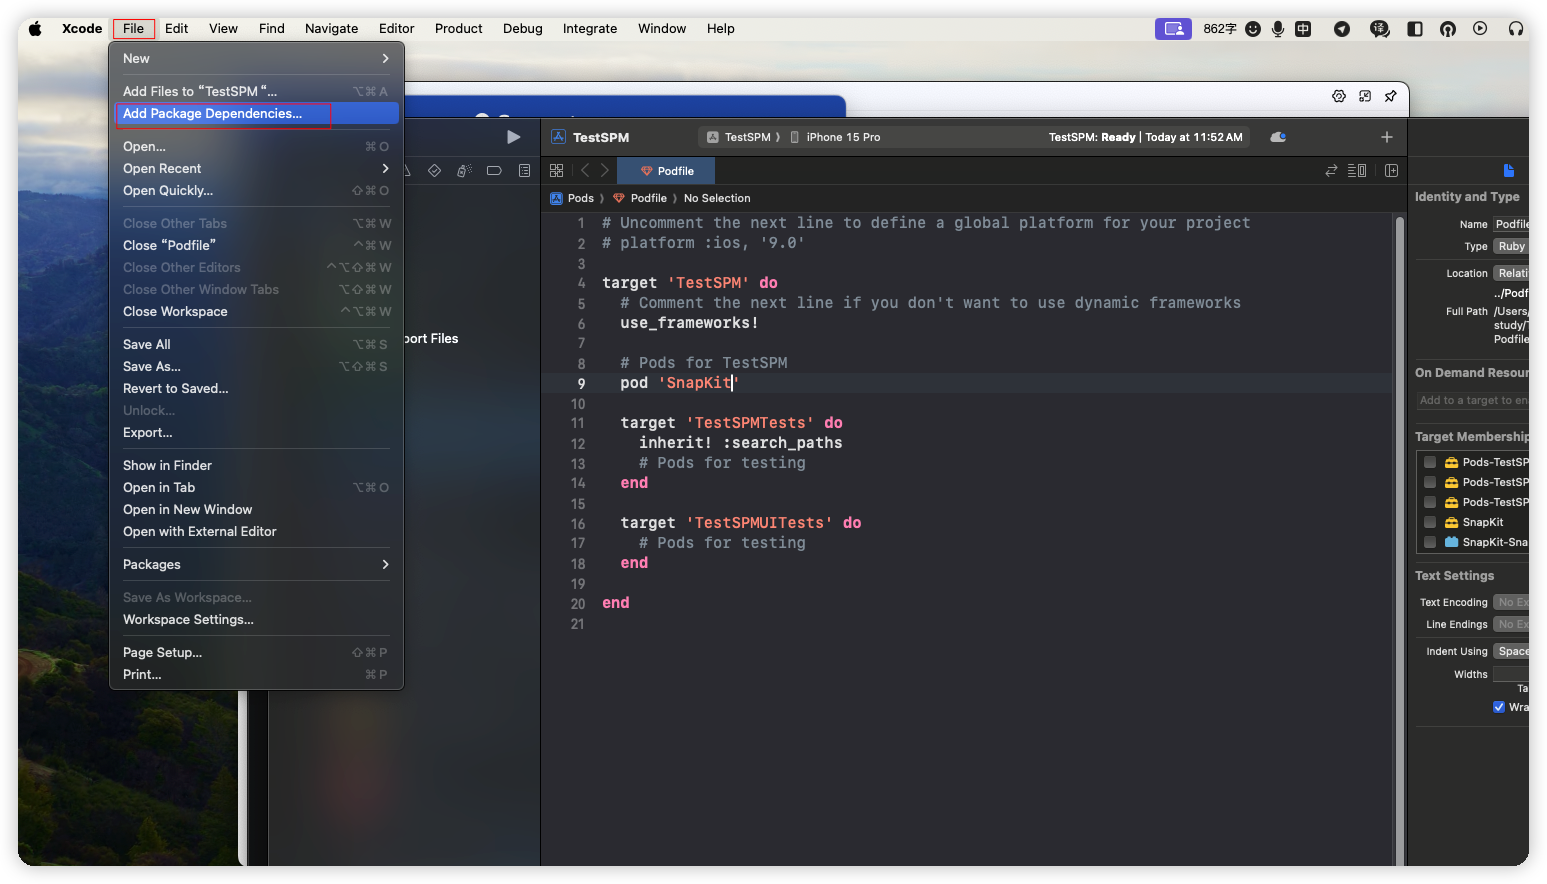
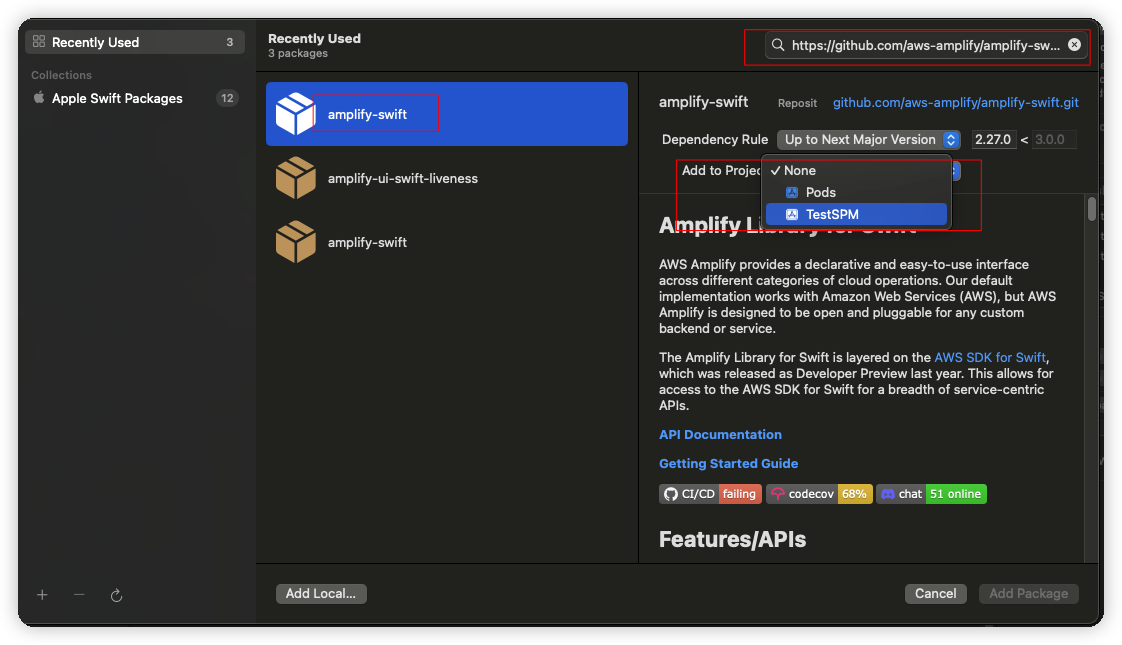
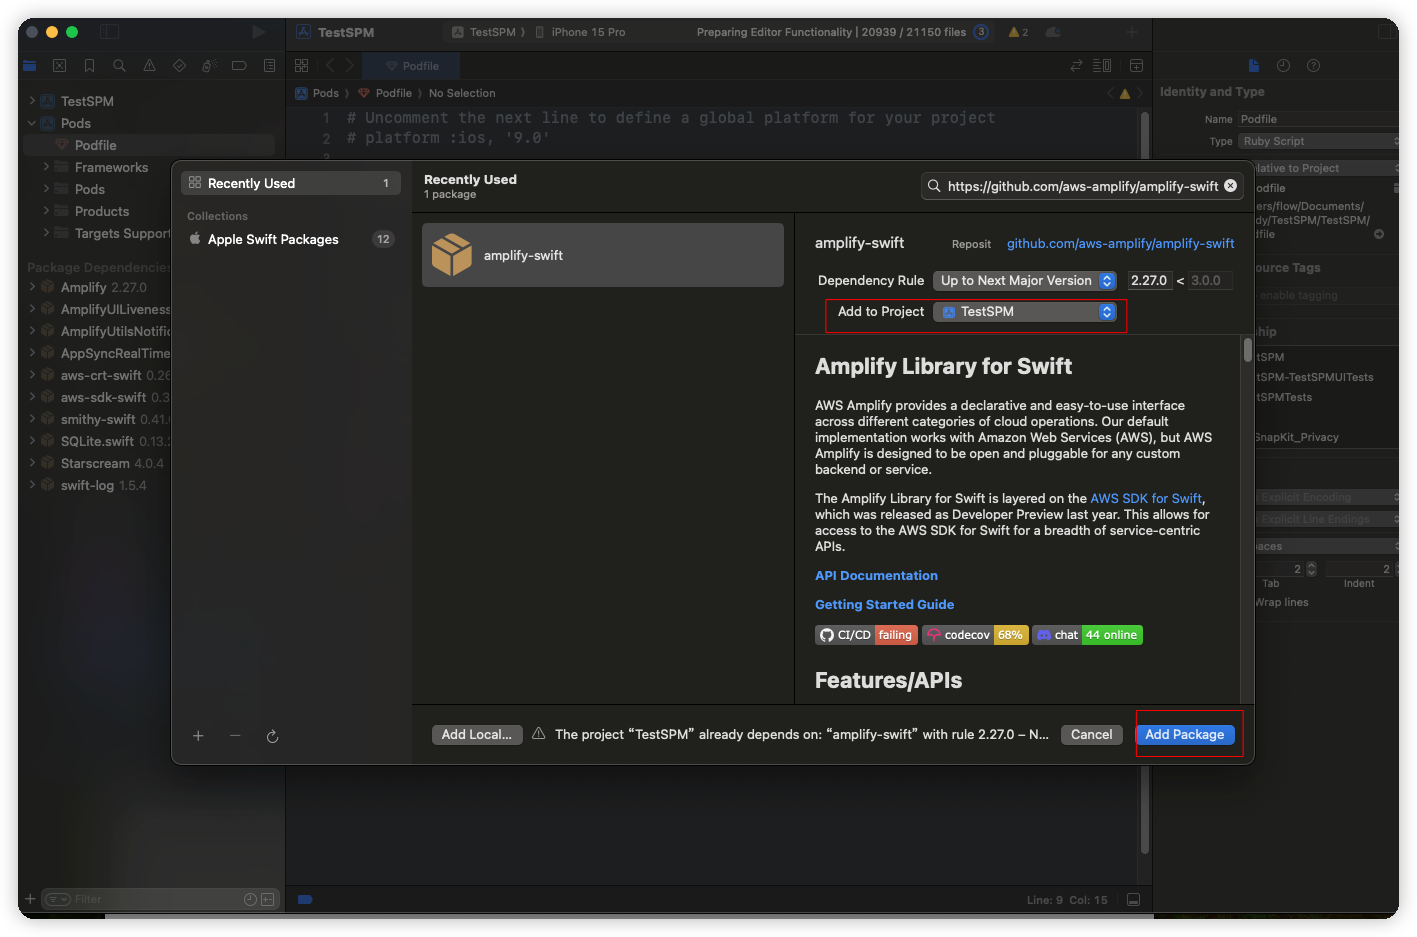
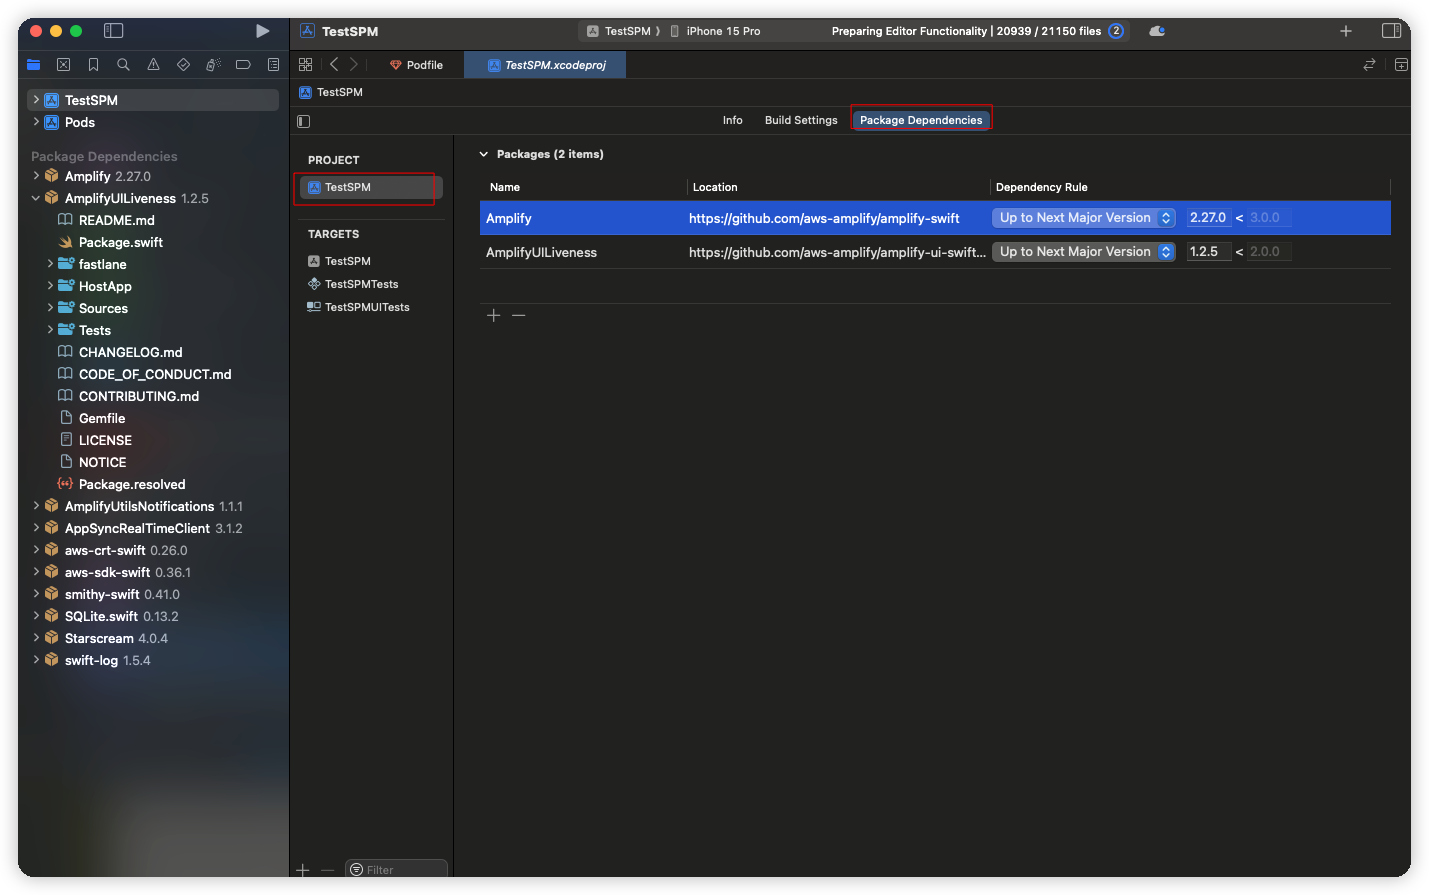
普通项目或Pod项目中引入Swift Package Manager管理的项目
以接入amplify-swift git地址:https://github.com/aws-amplify/amplify-swift
以接入amplify-ui-swift-liveness git地址:https://github.com/aws-amplify/amplify-ui-swift-liveness
UIKit里引入SwiftUI框架
由于引入的
AmplifyUILiveness是使用的SwiftUI,我们的主题项目使用的是标准UIKit,所以需要再普通页面引入需要进行包装一成
参考:
- SwiftUI 与 UIKit 混合开发 使用
UIHostingController进行包装1 2 3 4 5 6 7 8 9 10 11 12 13 14 15 16 17
import UIKit import SwiftUI class ViewController: UIViewController { override func viewDidLoad() { super.viewDidLoad() let btn = UIButton(frame: CGRect(x: 100, y: 100, width: 60, height: 40)) btn.setTitle("showTest", for: .normal) btn.setTitleColor(.black, for: .normal) btn.addTarget(self, action: #selector(showMyTestSwiftUI), for: .touchUpInside) self.view.addSubview(btn) } @objc func showMyTestSwiftUI() { let vc = UIHostingController(rootView: Text("Text")) self.navigationController?.pushViewController(vc, animated: true) } }自定义
Swift Package Manager管理的项目由于我们的主项目需要支持到
iOS12,但SwiftUI最低需要iOS14,所以需要把AmplifyUILiveness下载好源码改成普通UIKit的框架
本地调试SPM项目: 参考:iOS包依赖管理工具(五):Swift Package Manager(SPM)自定义篇
1、创建Package项目:Xcode -> File -> New -> Project 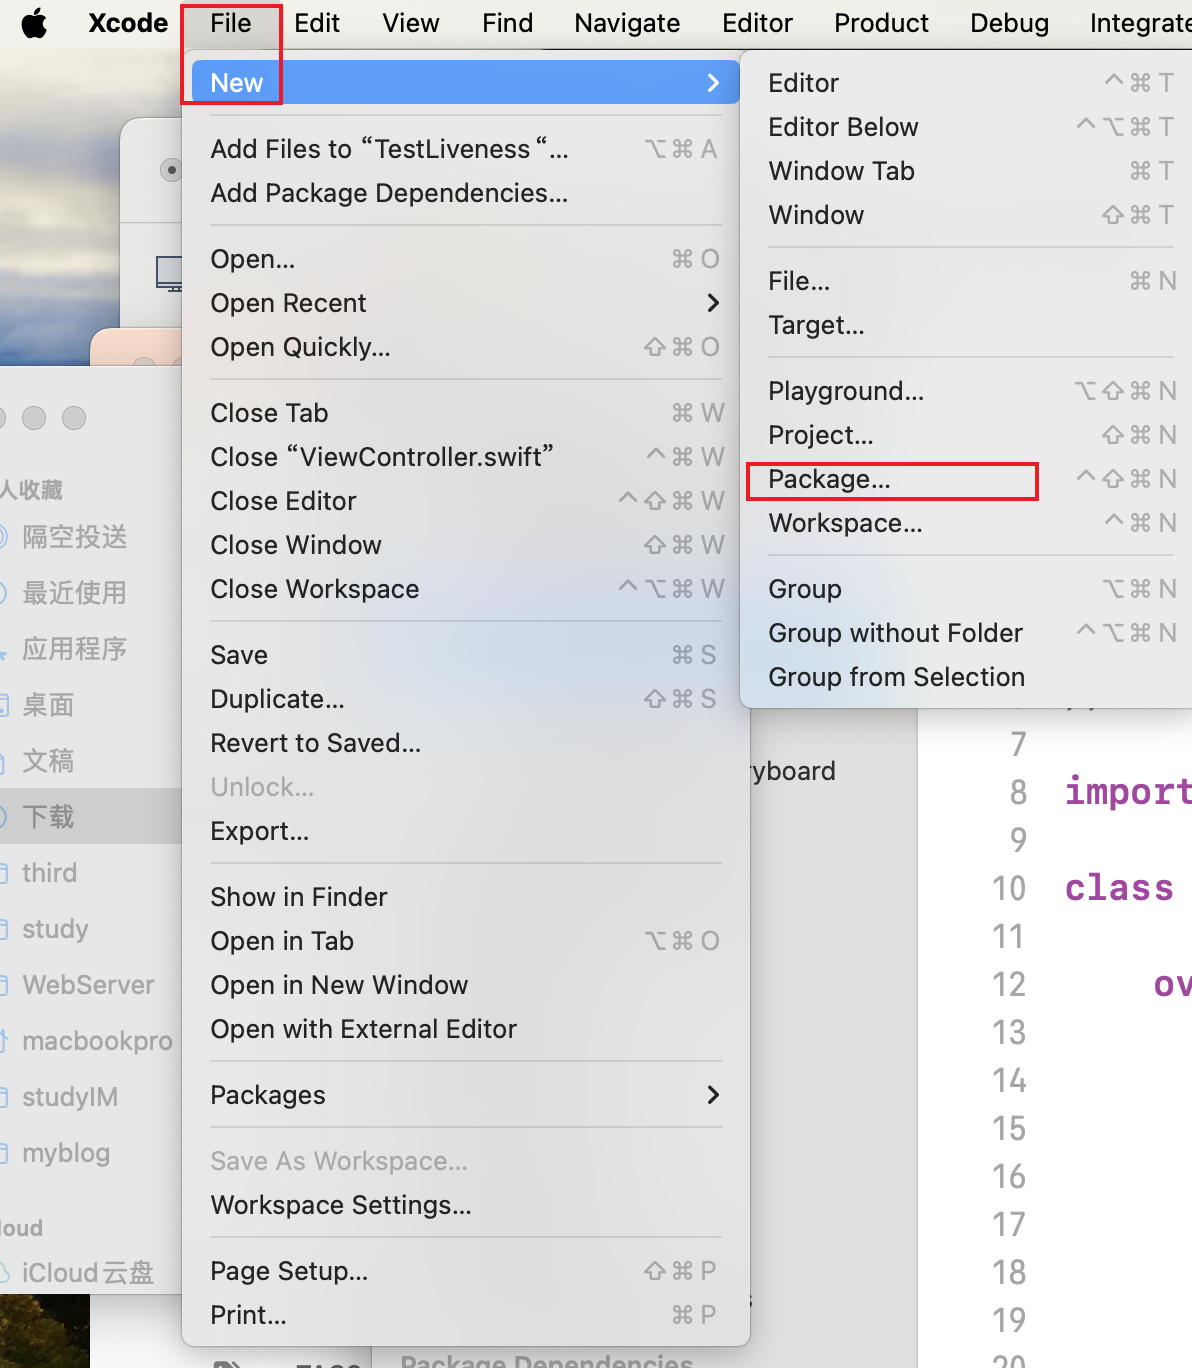 2、将自己创建的或网上下载的SPM的Package项目拖拽到测试项目,一定要将生成的包含
Package.swift的那个文件夹拖拽到项目里 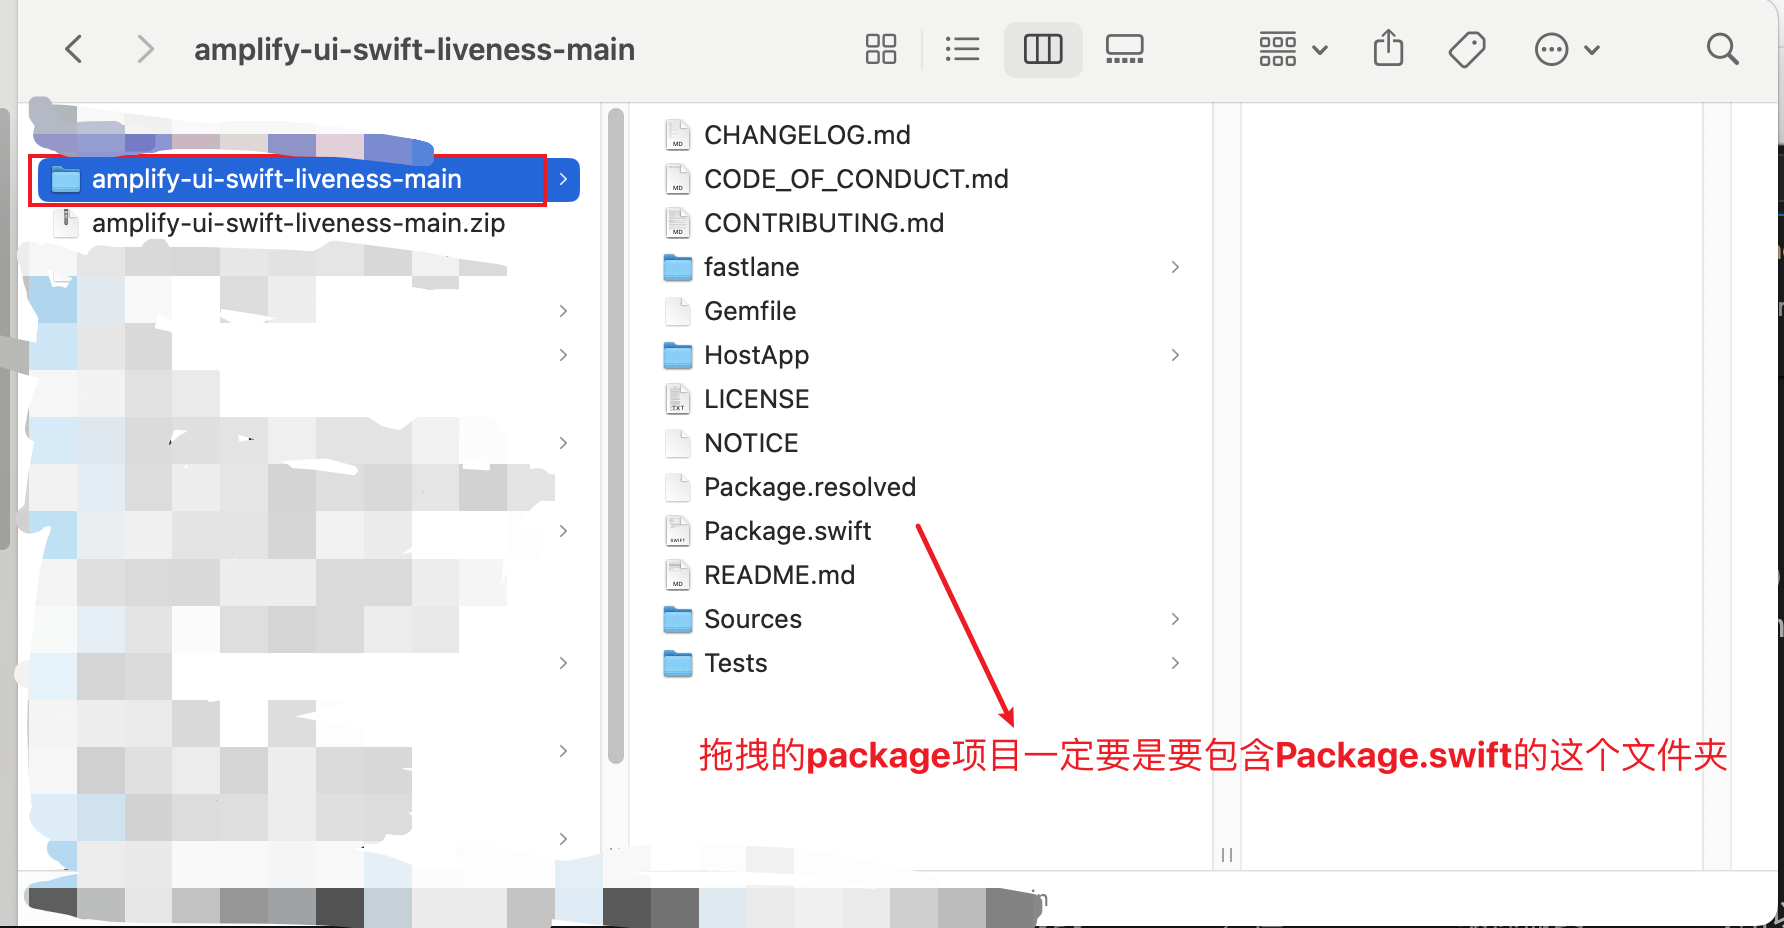 2.2 拖拽到项目里后显示的是这样
 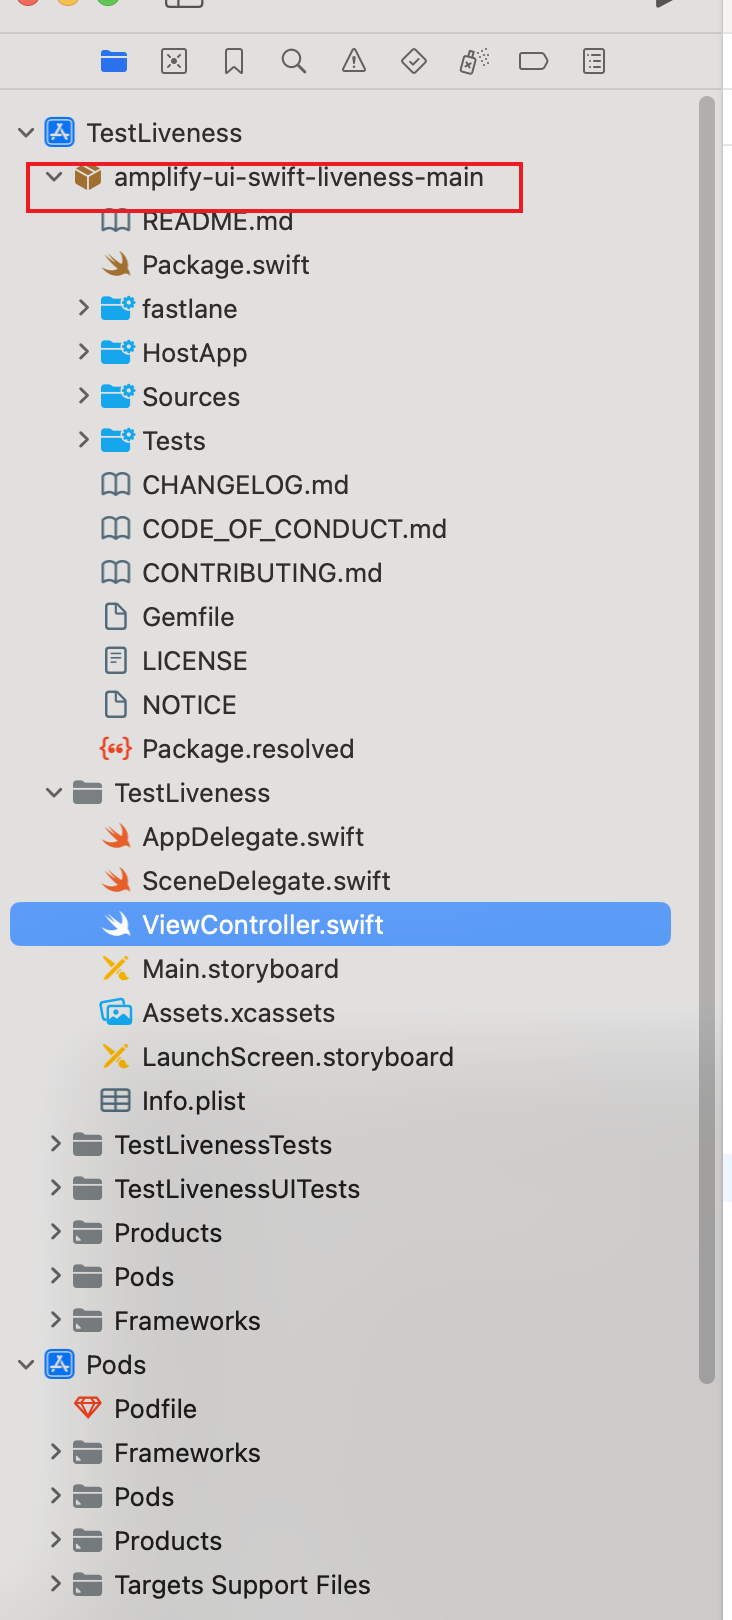 2.3 在
2.3 在Targets -> xxx -> Gegeral -> Frameworks, Libraries, and Embeded Content -> + 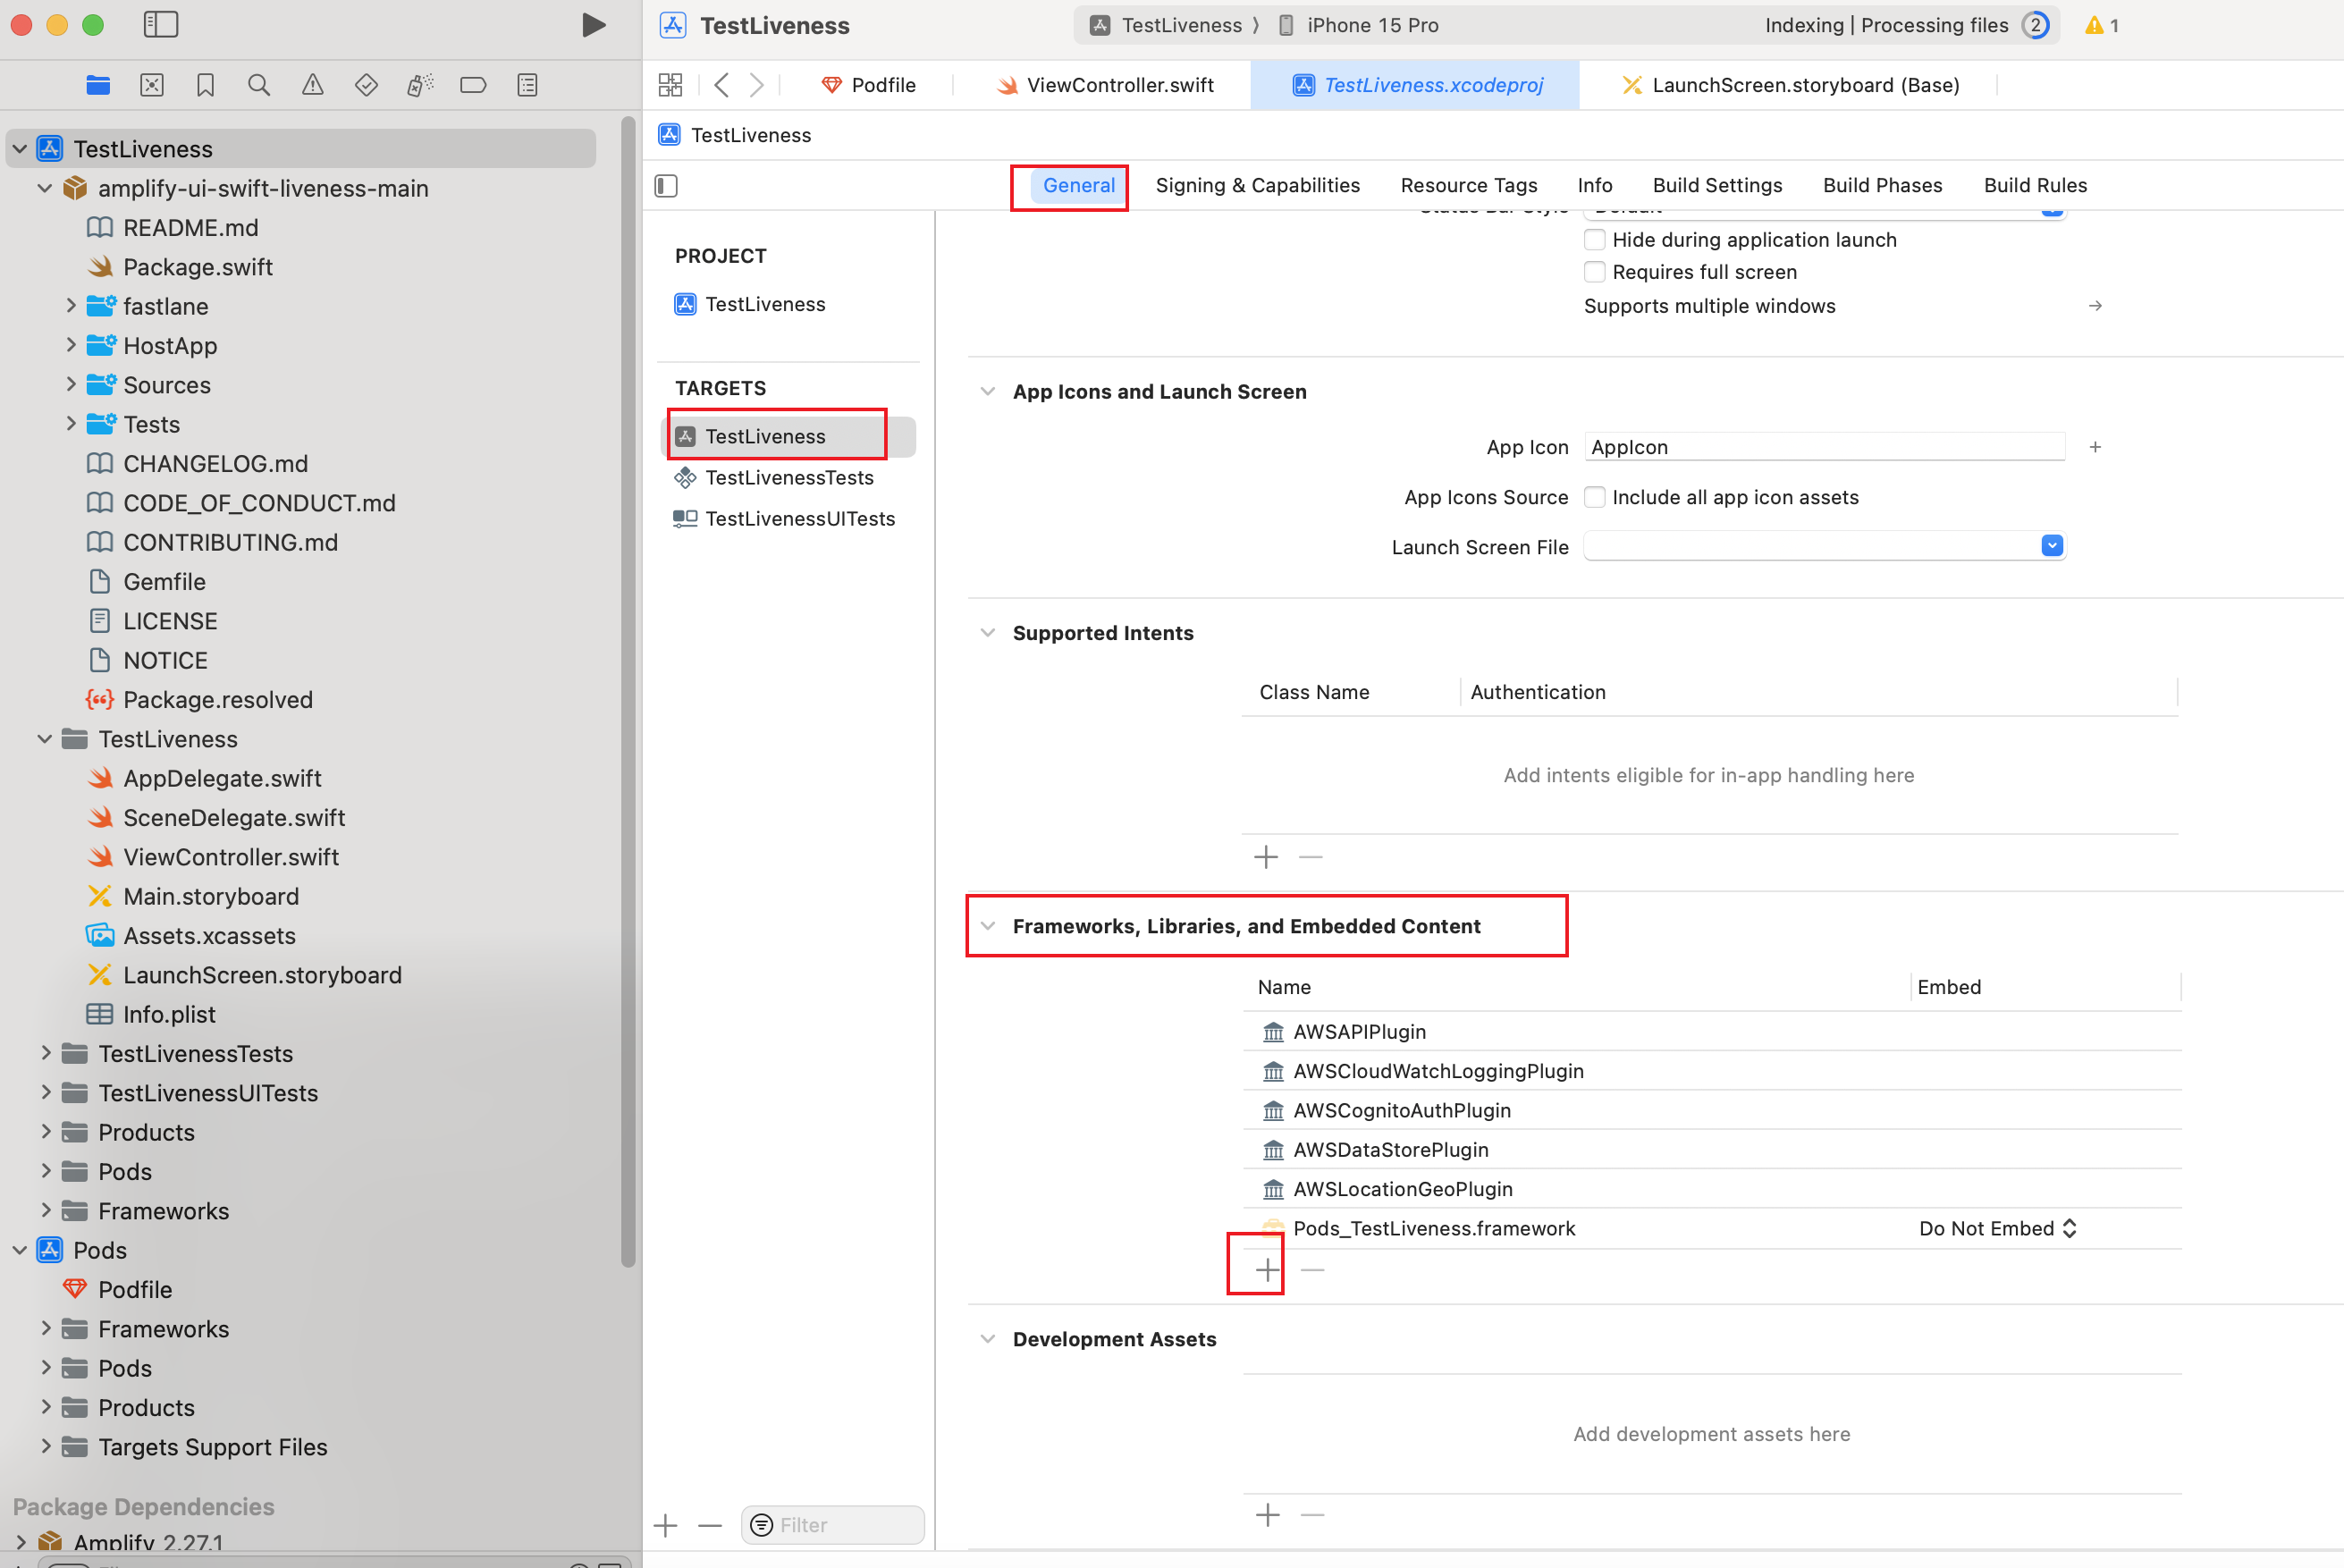 2.4 选中对应的库,然后选择
Add到项目里 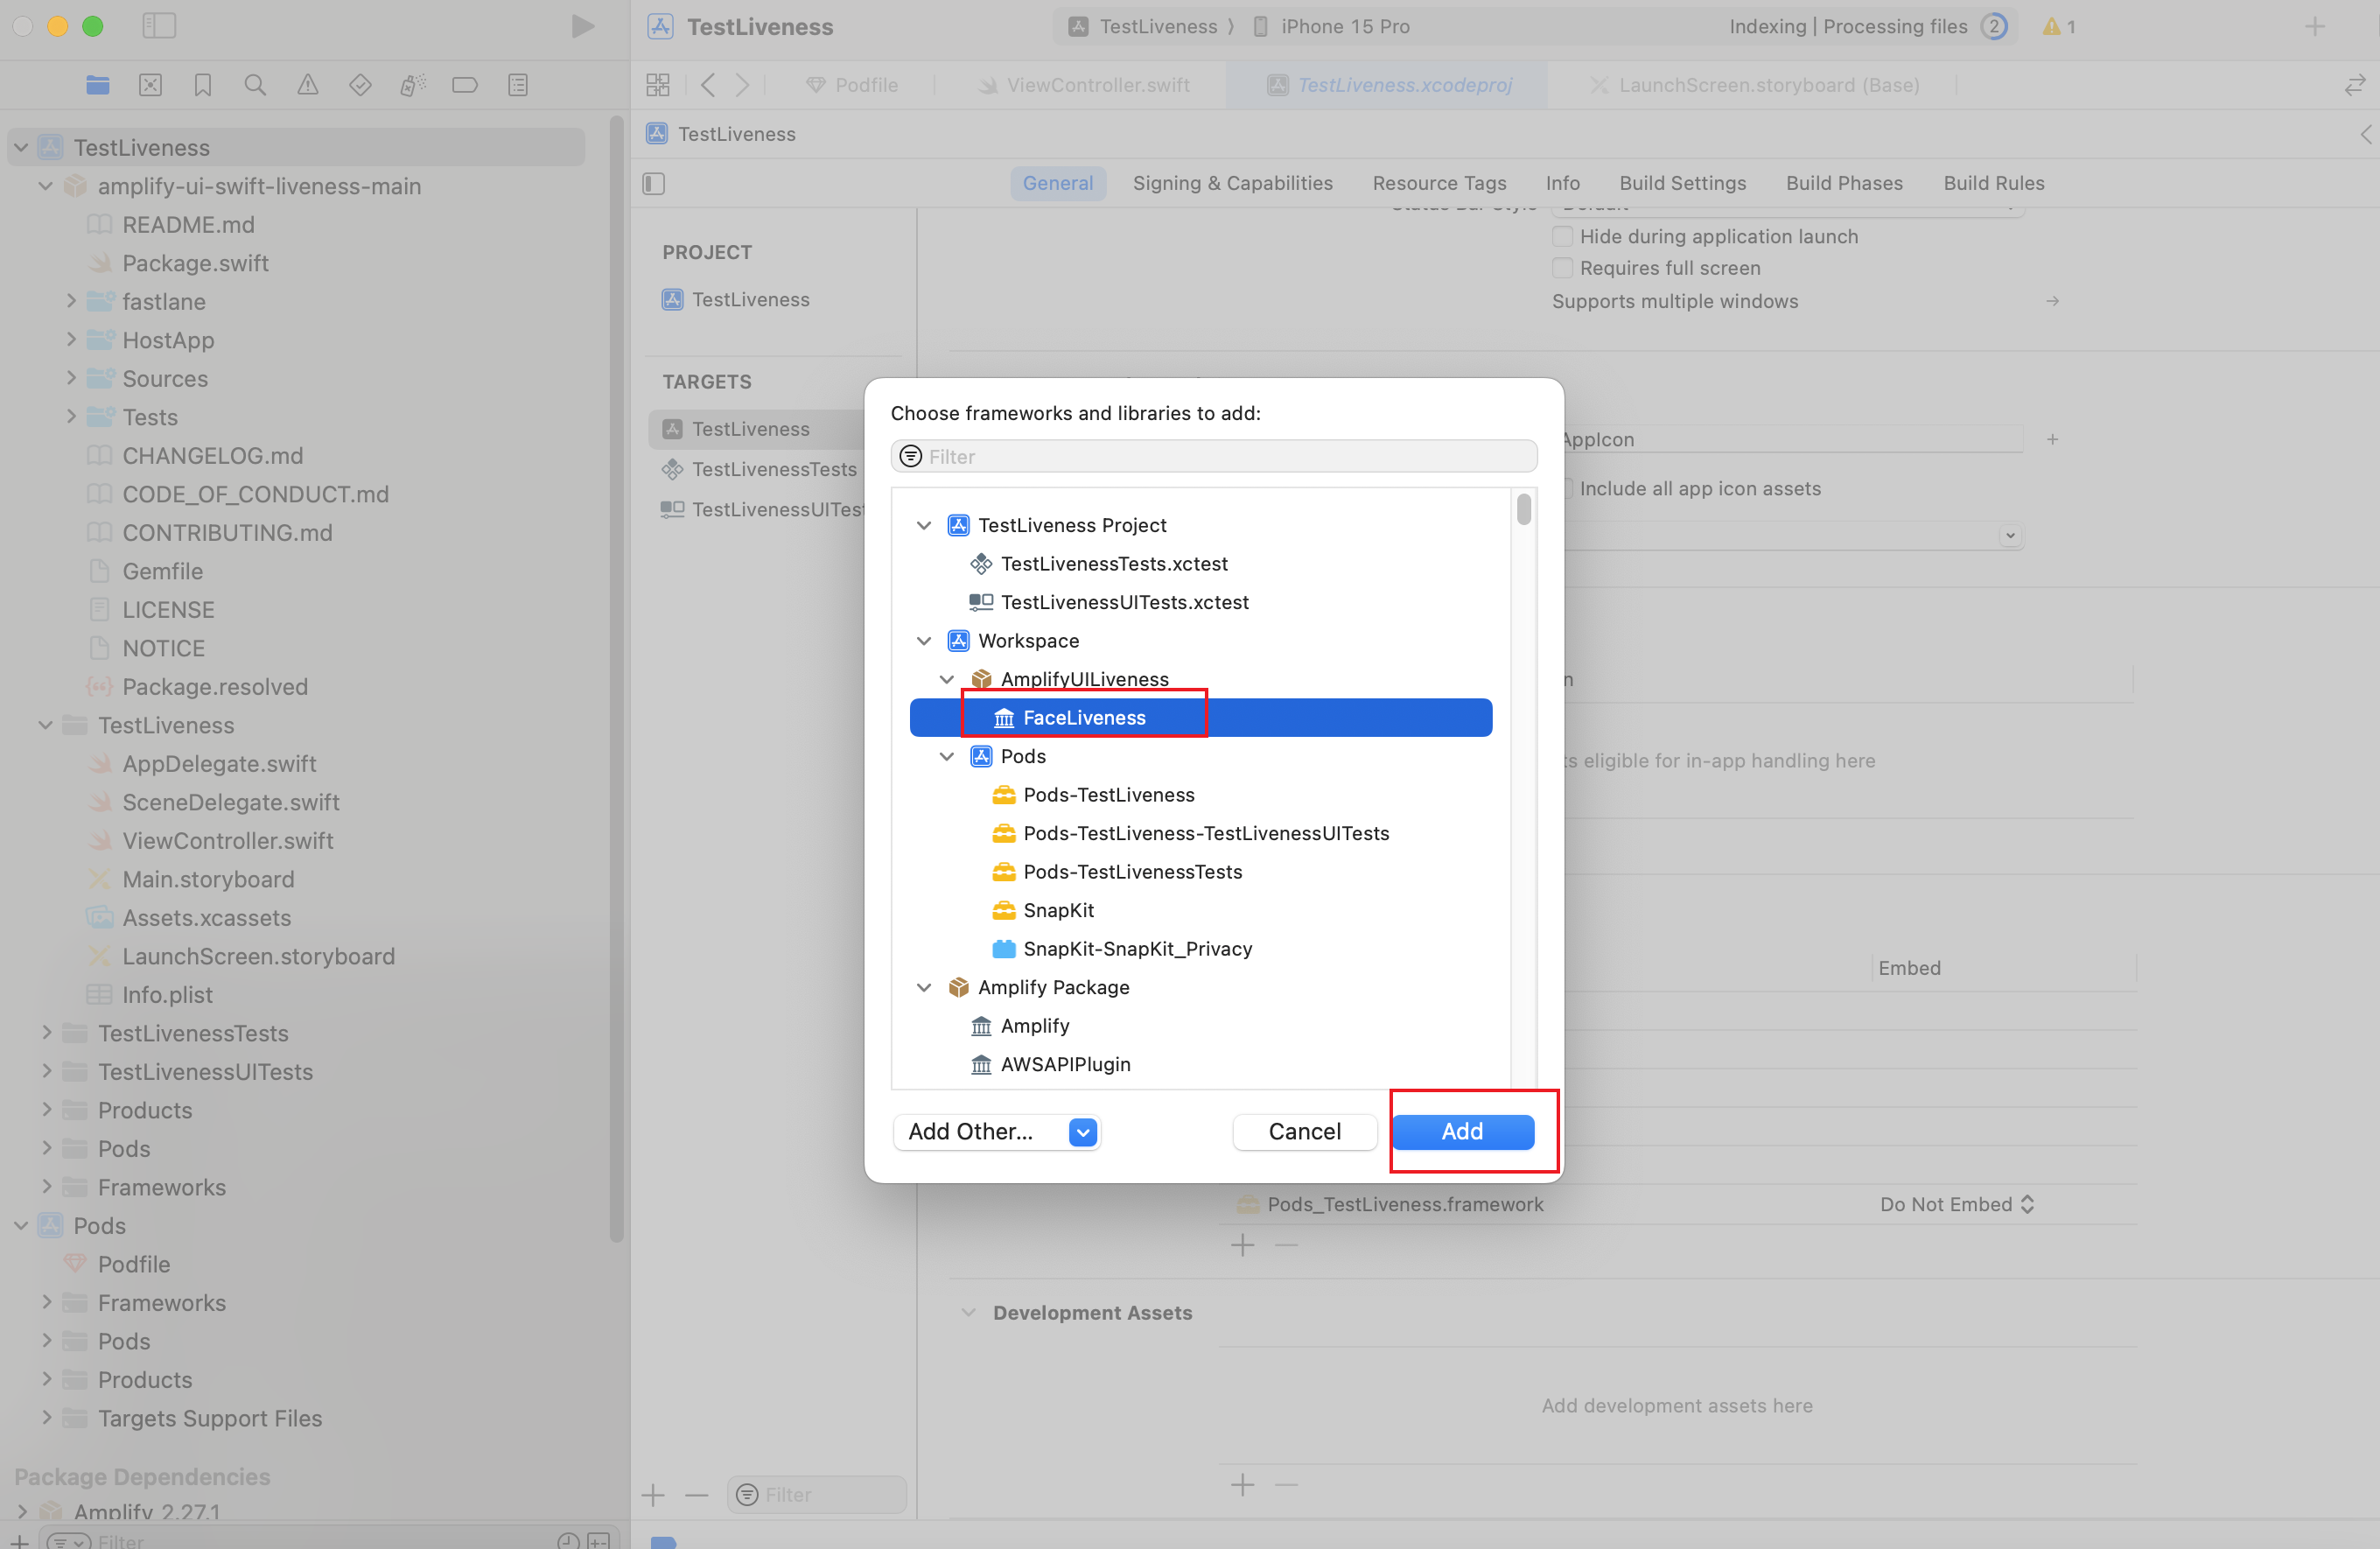
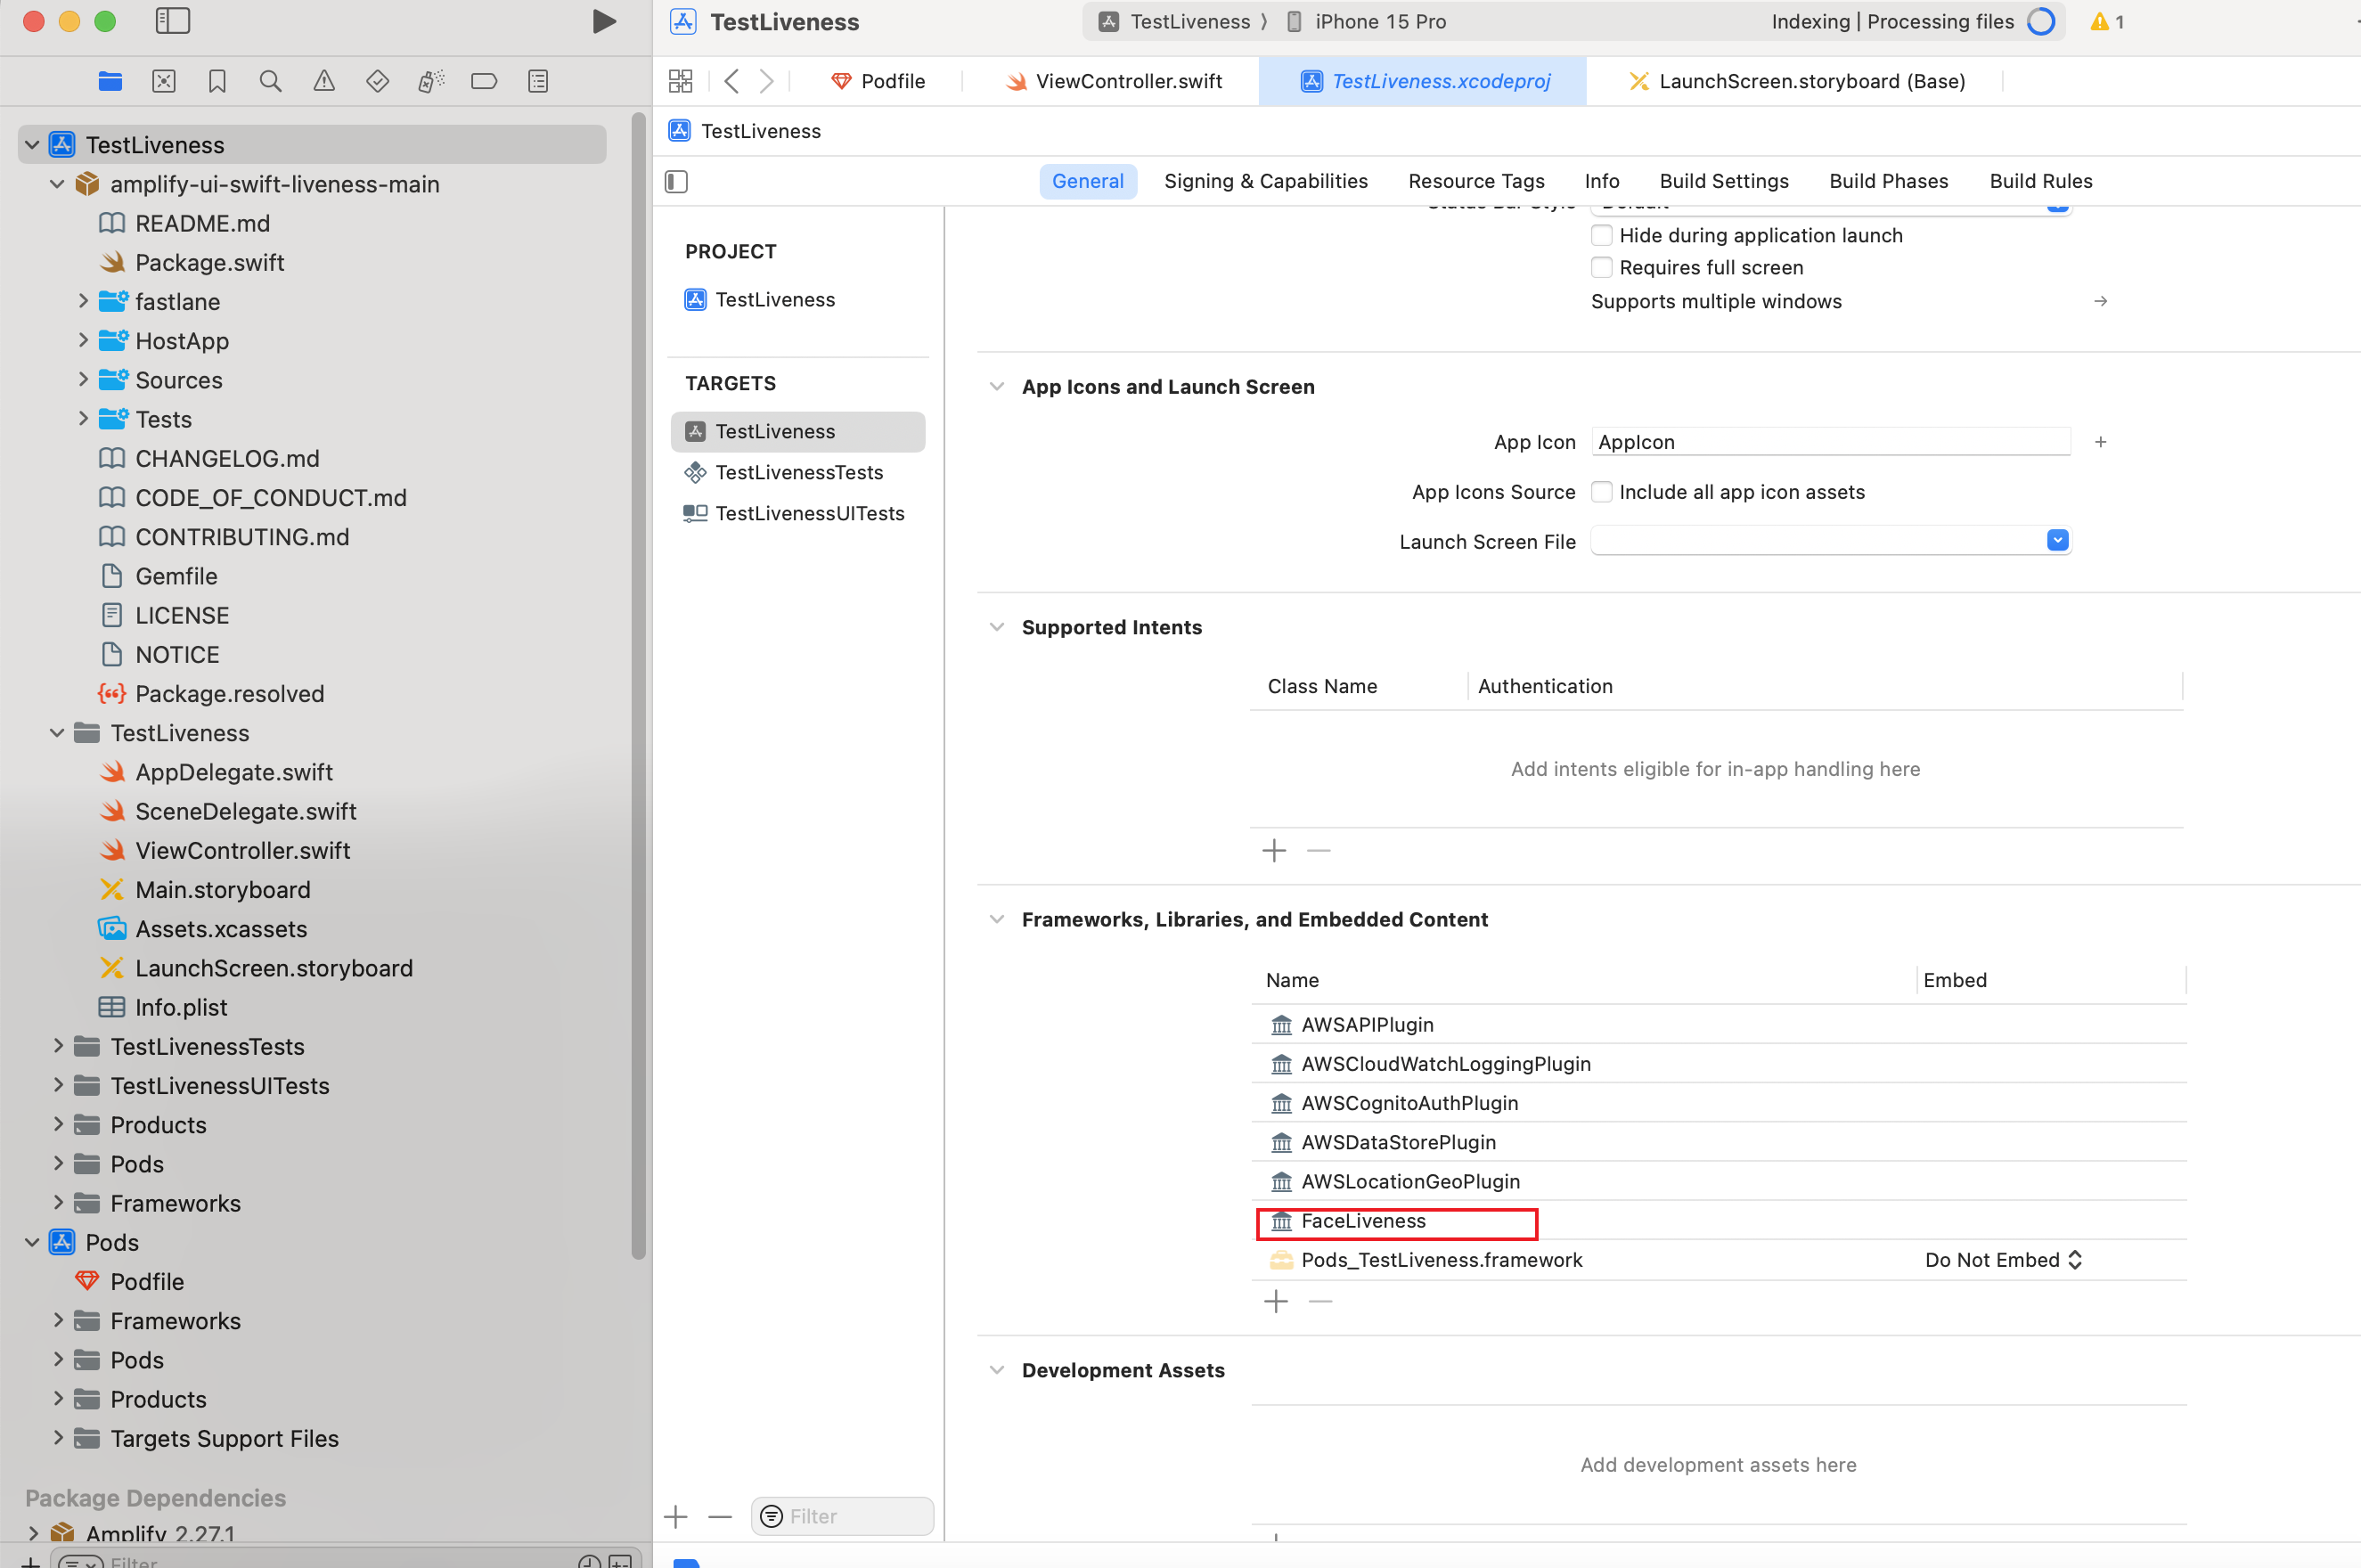
 2.4、以接入的项目里为例,在项目中使用
1
2
3
4
5
6
7
8
9
10
11
12
13
14
15
16
17
18
19
20
21
22
23
24
25
26
27
28
29
30
31
32
33
34
35
36
37
38
39
40
41
42
43
44
45
46
47
48
49
50
51
52
53
54
55
56
57
58
59
60
61
62
63
64
65
66
67
import UIKit
import FaceLiveness
import SwiftUI
import AWSPluginsCore
import Amplify

class ViewController: UIViewController {

    override func viewDidLoad() {
        super.viewDidLoad()
        // Do any additional setup after loading the view.

        let btn = UIButton(type: .custom)
        btn.setTitle("test", for: .normal)
        btn.backgroundColor = .lightGray
        btn.setTitleColor(.systemBlue, for: .normal)
        btn.addTarget(self, action: #selector(testClick), for: .touchUpInside)
        btn.frame = .init(x: 100, y: 100, width: 100, height: 50)
        self.view.addSubview(btn)
    }

    @objc func testClick() {
        let vc = UIHostingController(rootView: MyFaceLiveCheckView())
        self.navigationController?.pushViewController(vc, animated: true)
    }

}


struct MyFaceLiveCheckView: View {
    @State private var isPresentingLiveness = true

      var body: some View {
        FaceLivenessDetectorView(
            sessionID: "xxx",
          credentialsProvider: MyCredentialsProvider(),
          region: "us-east-1",
          isPresented: $isPresentingLiveness,
          onCompletion: { result in
            switch result {
            case .success:
                // 检测结果
//                checkResult()
                break
            case .failure(let error):
                // 本地活体SDK报错
                print(error)
                break
            }
          }
        )
      }

}
struct MyCredentialsProvider: AWSCredentialsProvider {

    func fetchAWSCredentials() async throws -> AWSCredentials {
        return MyCredentials()
    }

    struct MyCredentials: AWSCredentials {
        var accessKeyId: String = "xxx"
        var secretAccessKey: String = "xxxx"
    }
}
核心操作:FaceLivenessDetectionViewModel 等待页面:GetReadyPageView -> CameraPreviewView -> previewCaptureSession?.startSession 开始 FaceLivenessDetectorView -> onBegin -> displayState = .displayingLiveness -> _FaceLivenessDetectionView 人脸扫描页面: _FaceLivenessDetectionView -> makeUIViewController -> _LivenessViewController -> viewDidAppear -> setupAVLayer -> viewModel.startCamera -> captureSession.startSession -> videoOutput.setSampleBufferDelegate -> 系统delegate回调 -> captureOutput -> FaceDetectorShortRange.detectFaces -> prediction(人脸数) -> detectionResultHandler?.process -> .singleFace -> 一个人脸且符合要求的人脸 -> 初始化配置 -> initializeLivenessStream -> livenessService?.initializeLivenessStream -> 链接aws服务器 -> websocket.open(url: xx) 有新视频流后: detectionResultHandler?.process -> .recording -> drawOval -> sendInitialFaceDetectedEvent
摄像头准备好后开始初始化Stream FaceLivenessDetectorView.init -> LivenessCaptureSession -> OutputSampleBufferCapturer -> FaceLivenessDetectionViewModel OutputSampleBufferCapturer -> faceDetector.detectFaces -> detectionResultHandler?.process FaceLivenessDetectionViewModel -> FaceDetectionResultHandler -> process -> initializeLivenessStream
视频流核心: CameraPreviewViewModel
