appium2:inspector的使用
appium2:inspector的使用
一、配置启动
要使用inspector,这里主要使用web版本的inspector进行查看演示,免安装 地址:https://inspector.appiumpro.com/
前提:
1、安装appium
1
2
3
4
5
6
7
8
# 安装node环境,如果没有安装
brew install node
# 查看node版本
node -v
npm -v

# 安装appium,可以是UI版本,也可以是命令行版本,我安装的事命令行版本,方便自动测试脚本运行
npm install -g appium
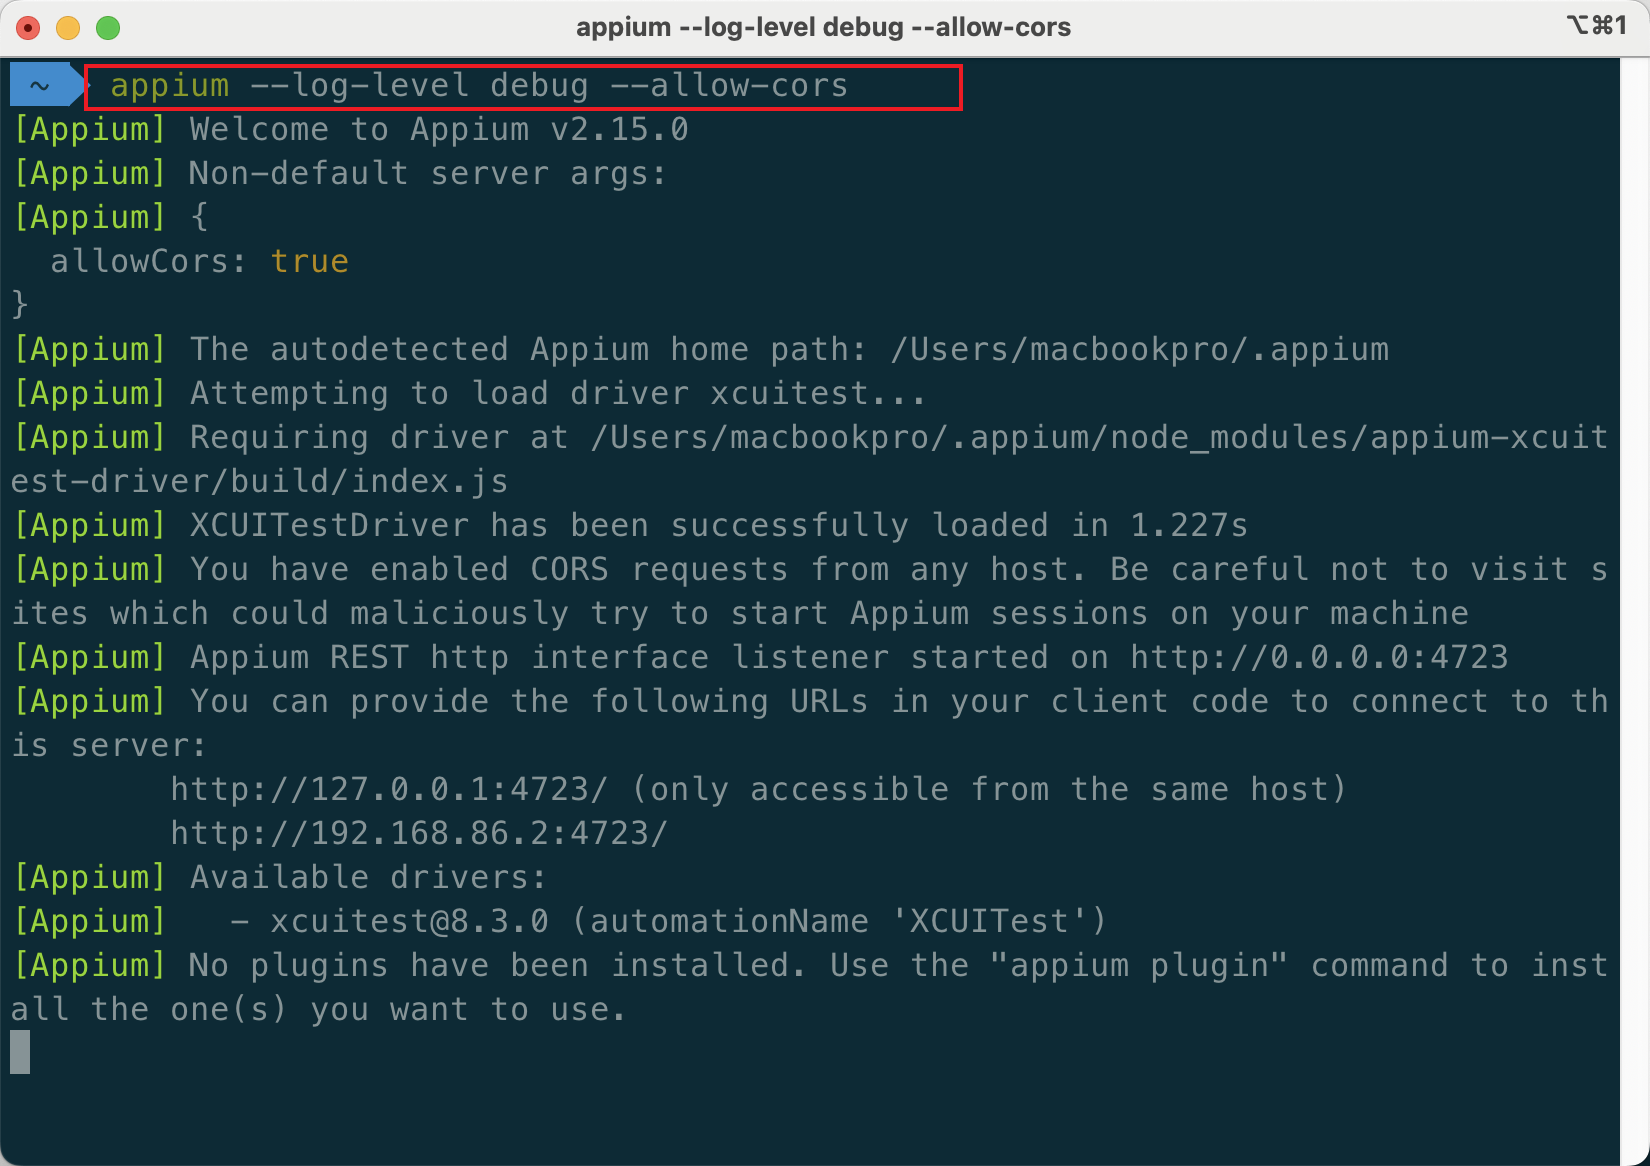
2、启动appium
1
appium --log-level debug --allow-cors
3、打开地址https://inspector.appiumpro.com/ 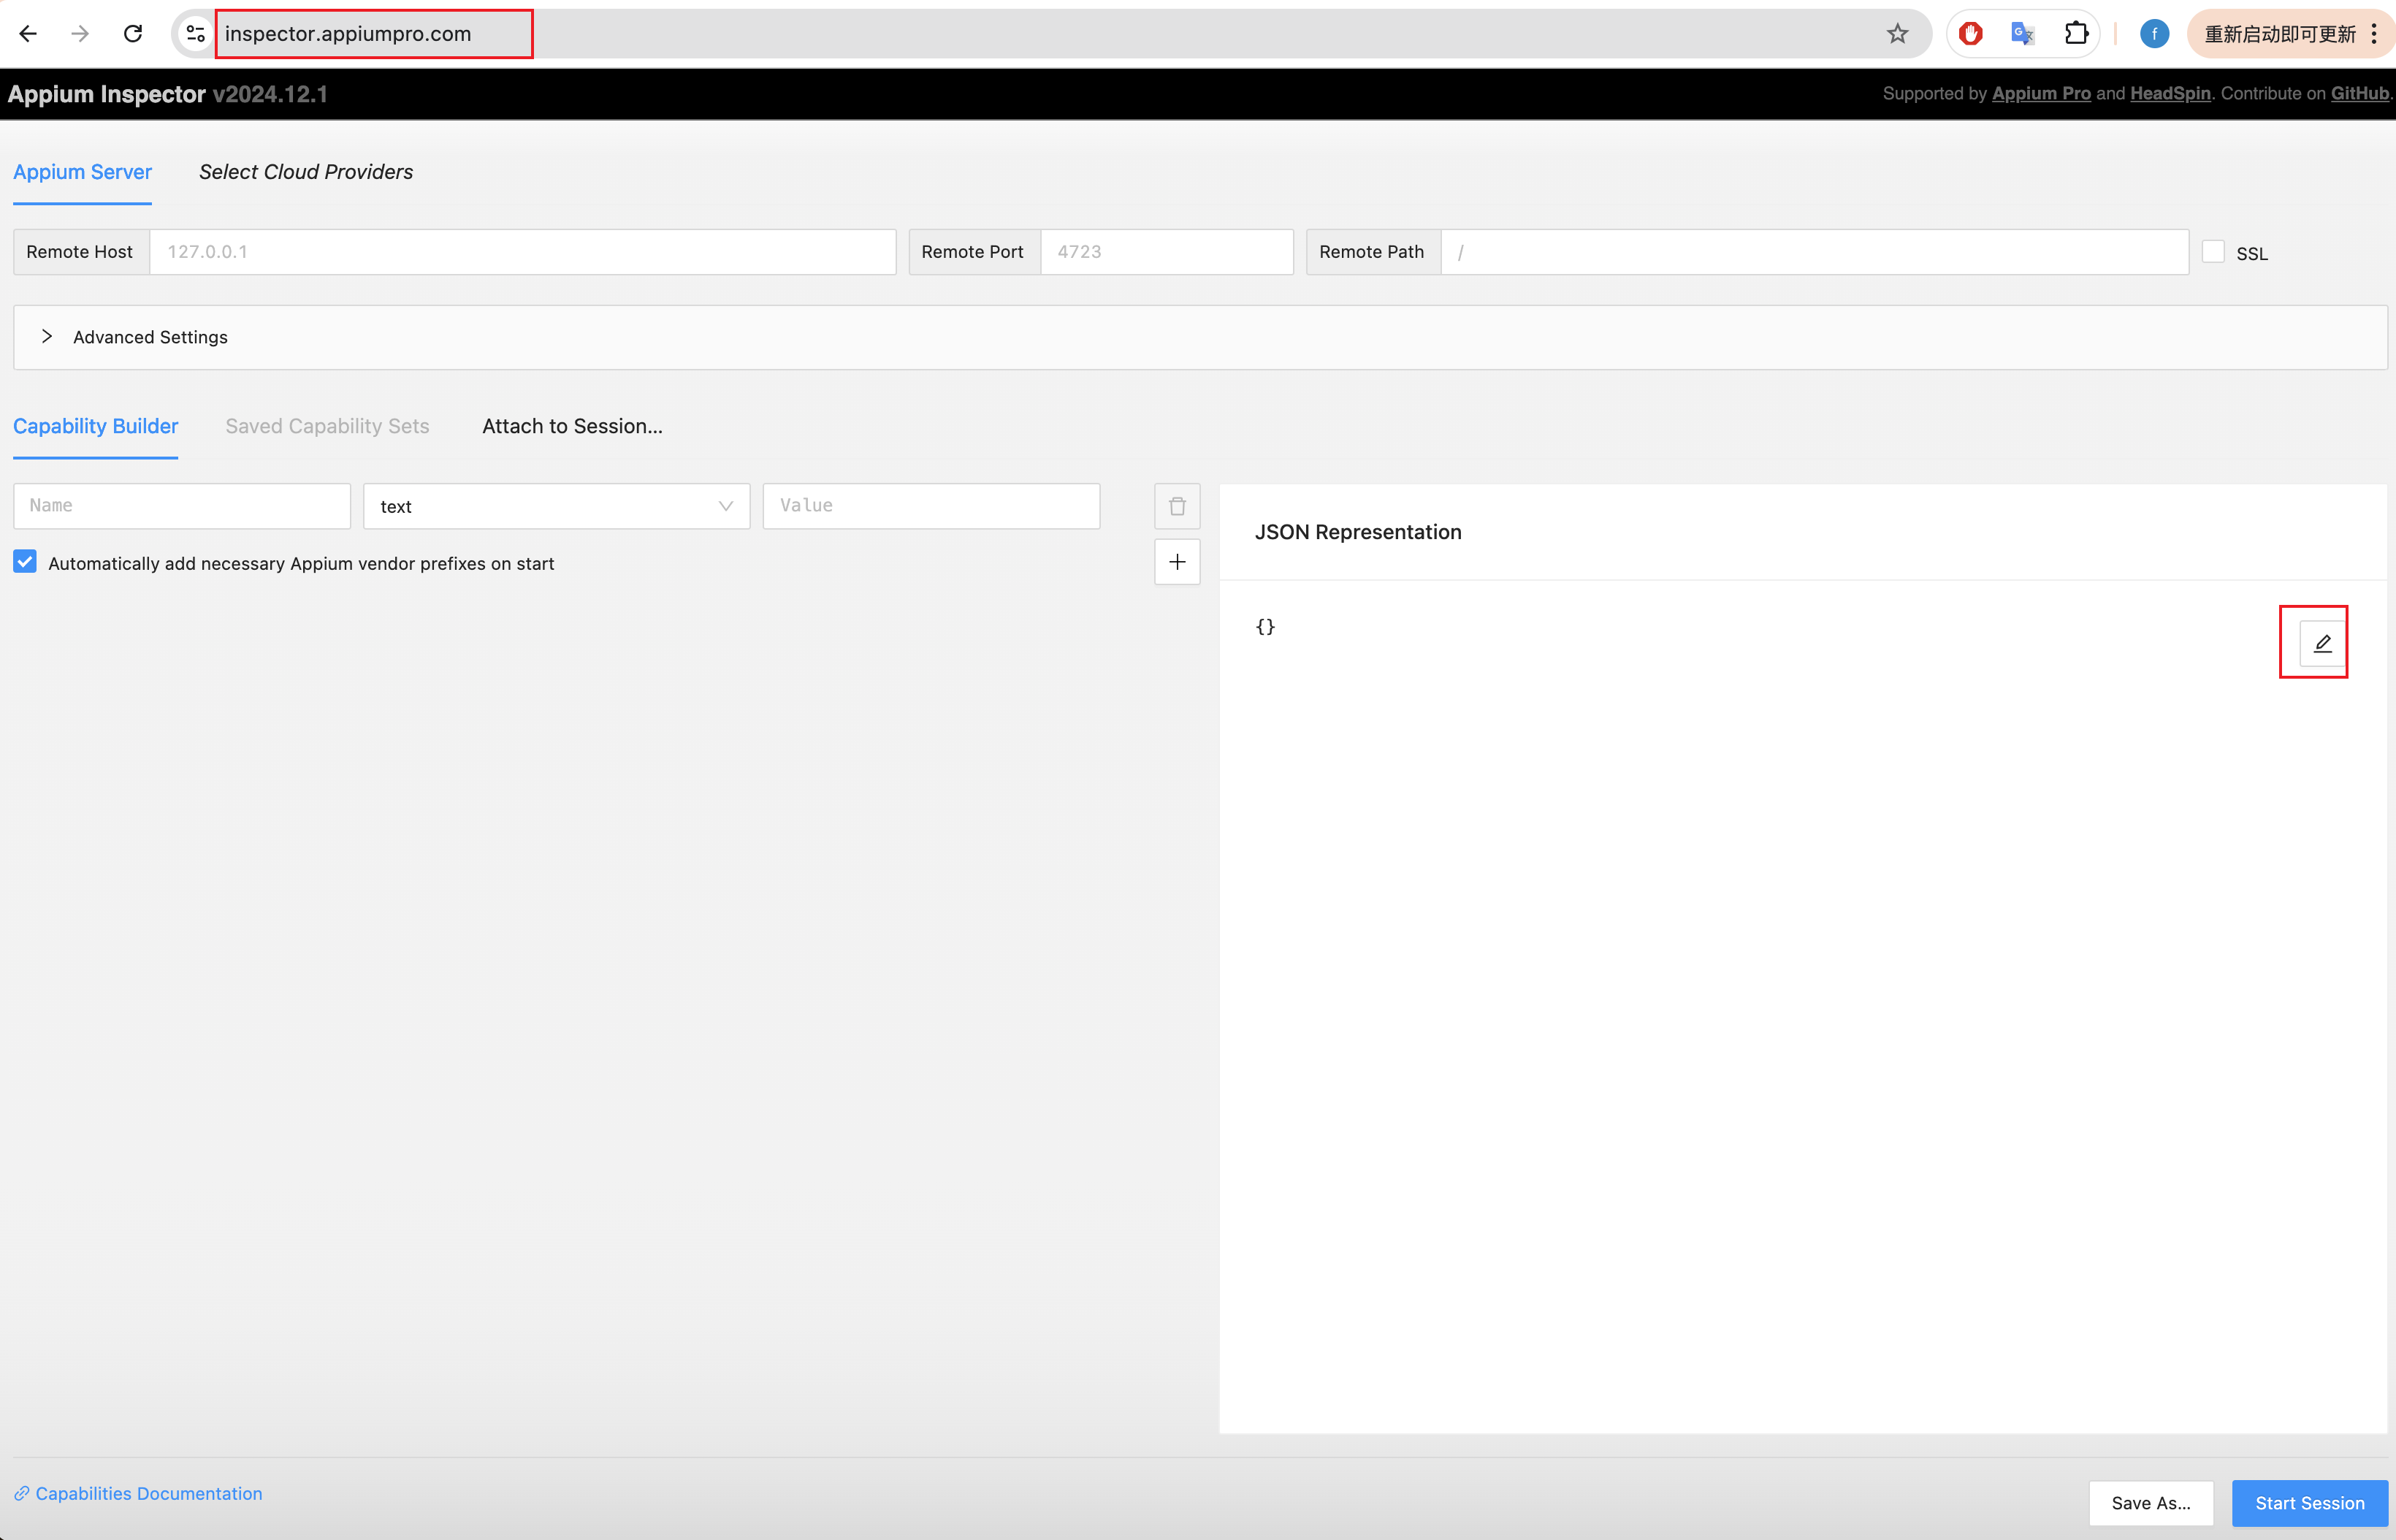 输入如下内容,并保存,系统及设备信息可修改
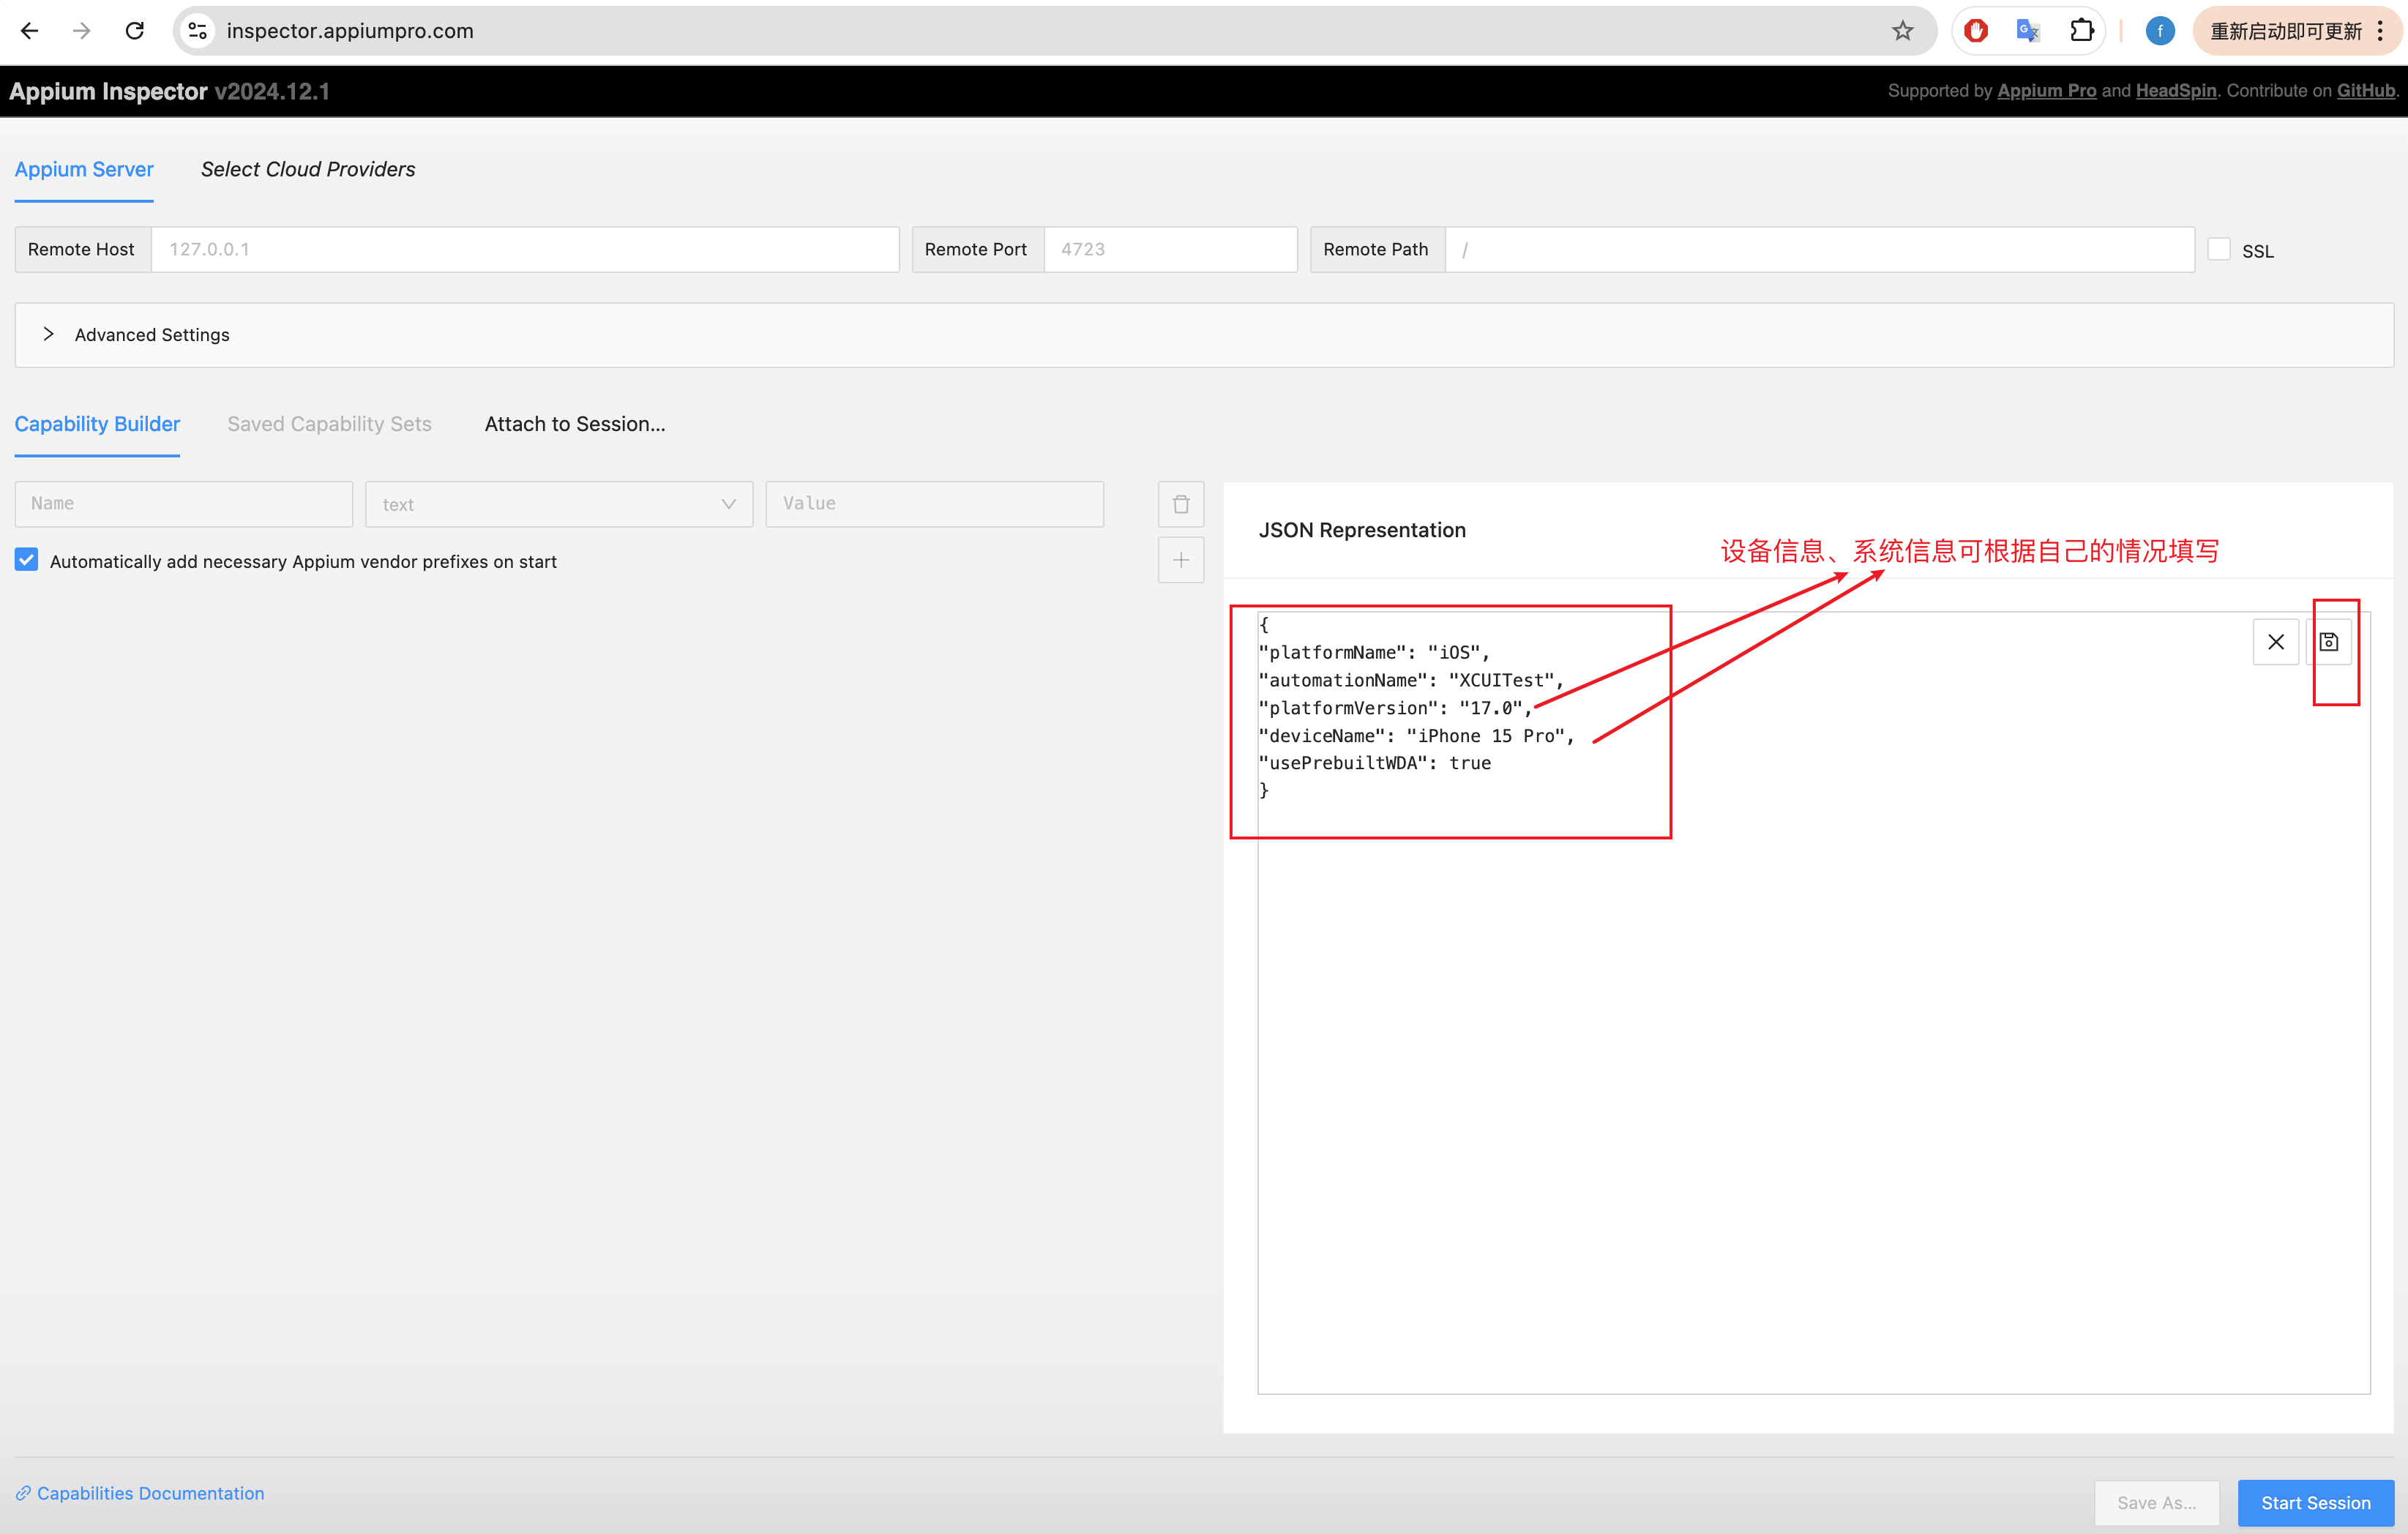
1
2
3
4
5
6
7
{
"platformName": "iOS",
"automationName": "XCUITest",
"platformVersion": "17.0",
"deviceName": "iPhone 15 Pro",
"usePrebuiltWDA": true
}
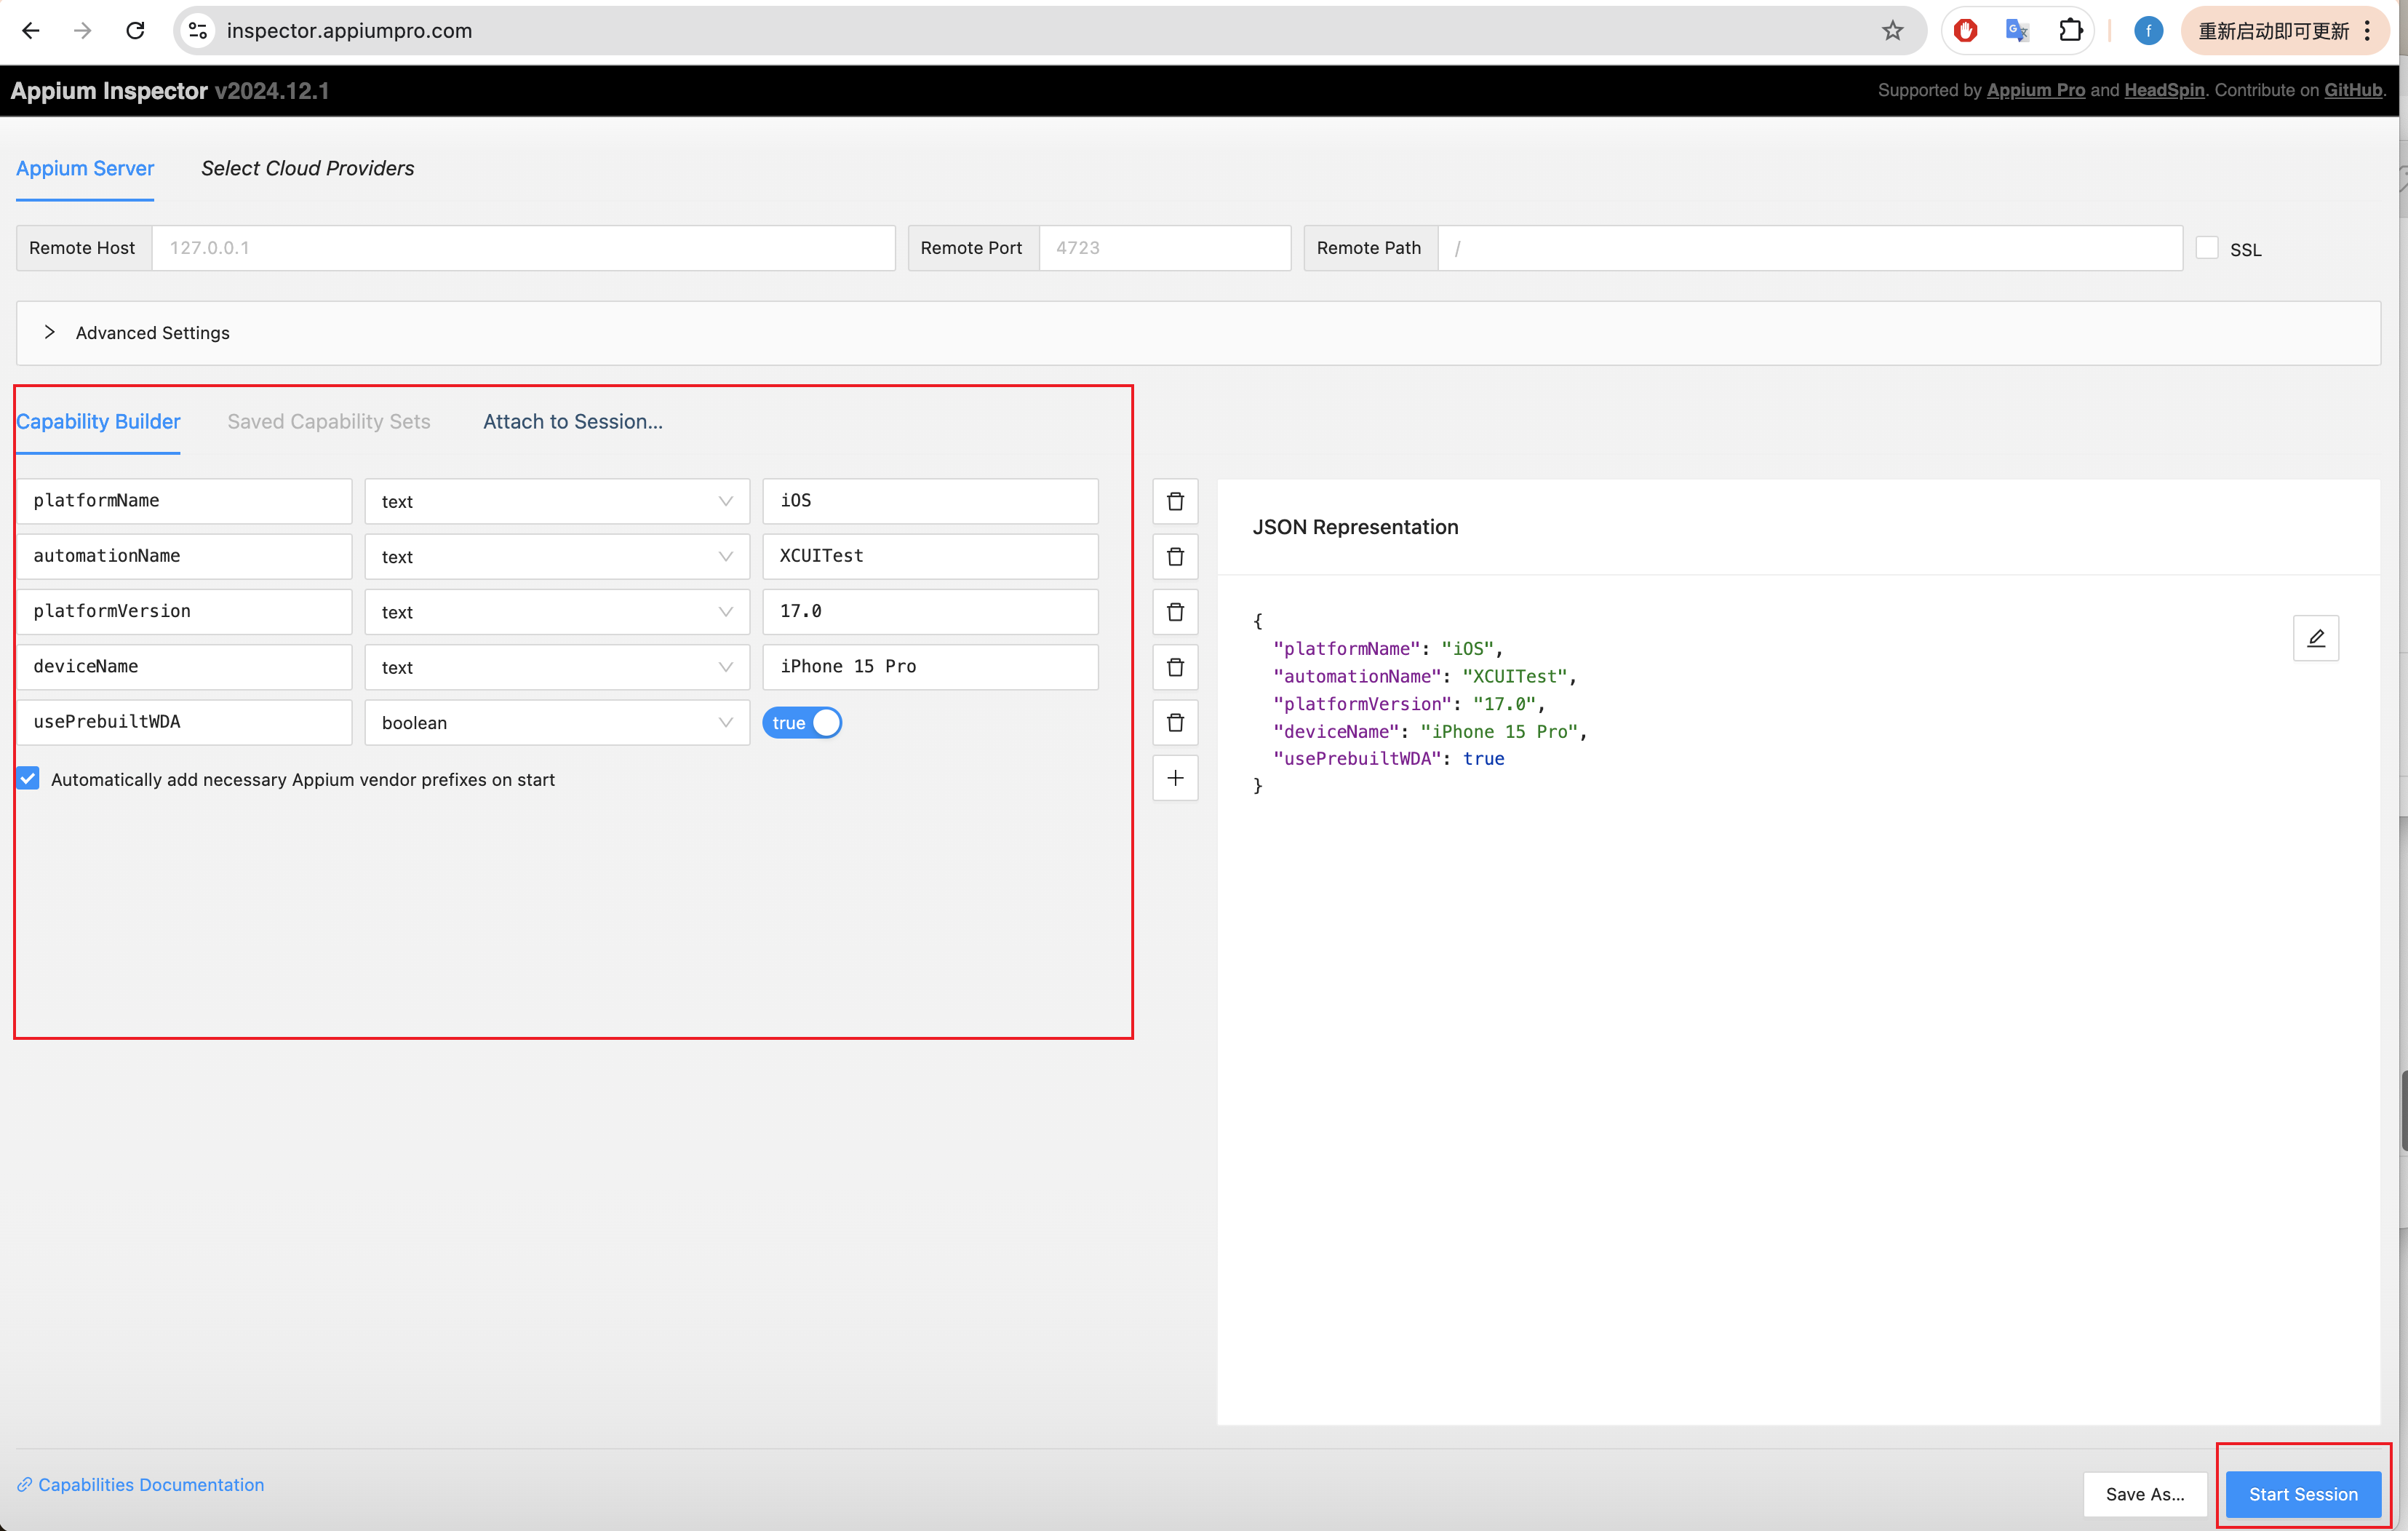 点击
点击start session就可正常链接了
二、查看元素节点
启动session后看到的第一个就是元素信息 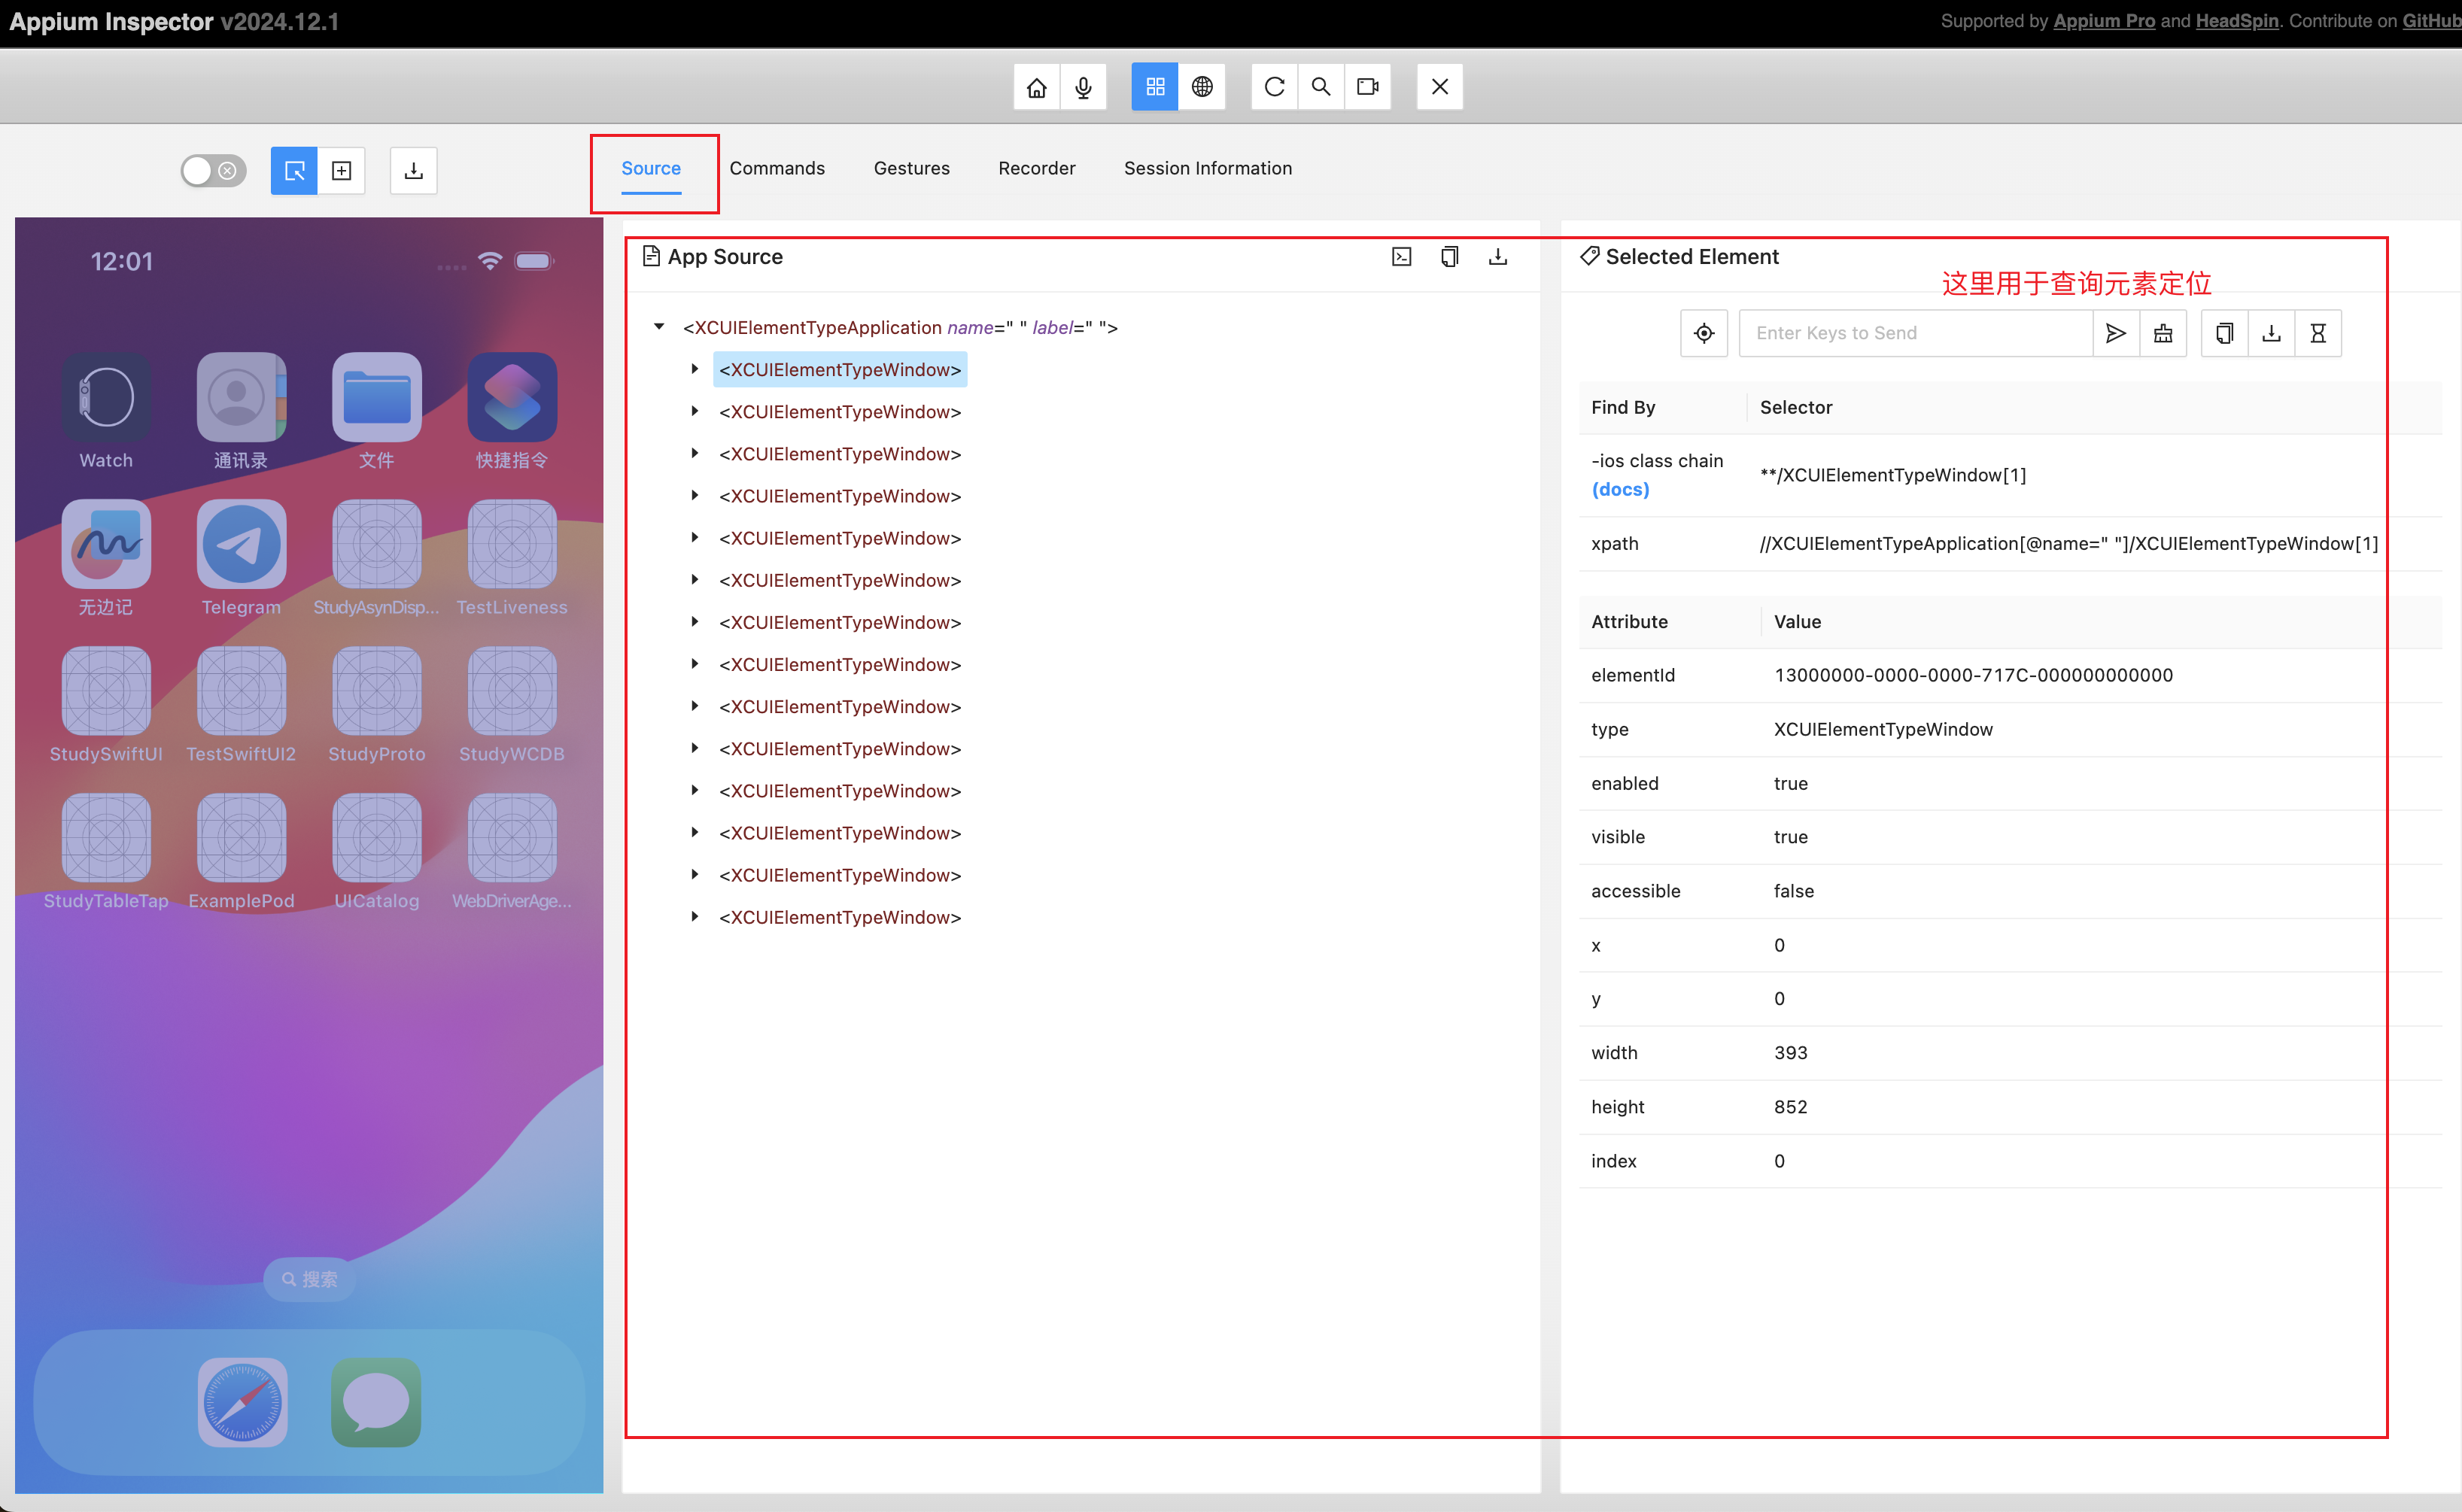
三、借用inspector配Python
链接信息参: 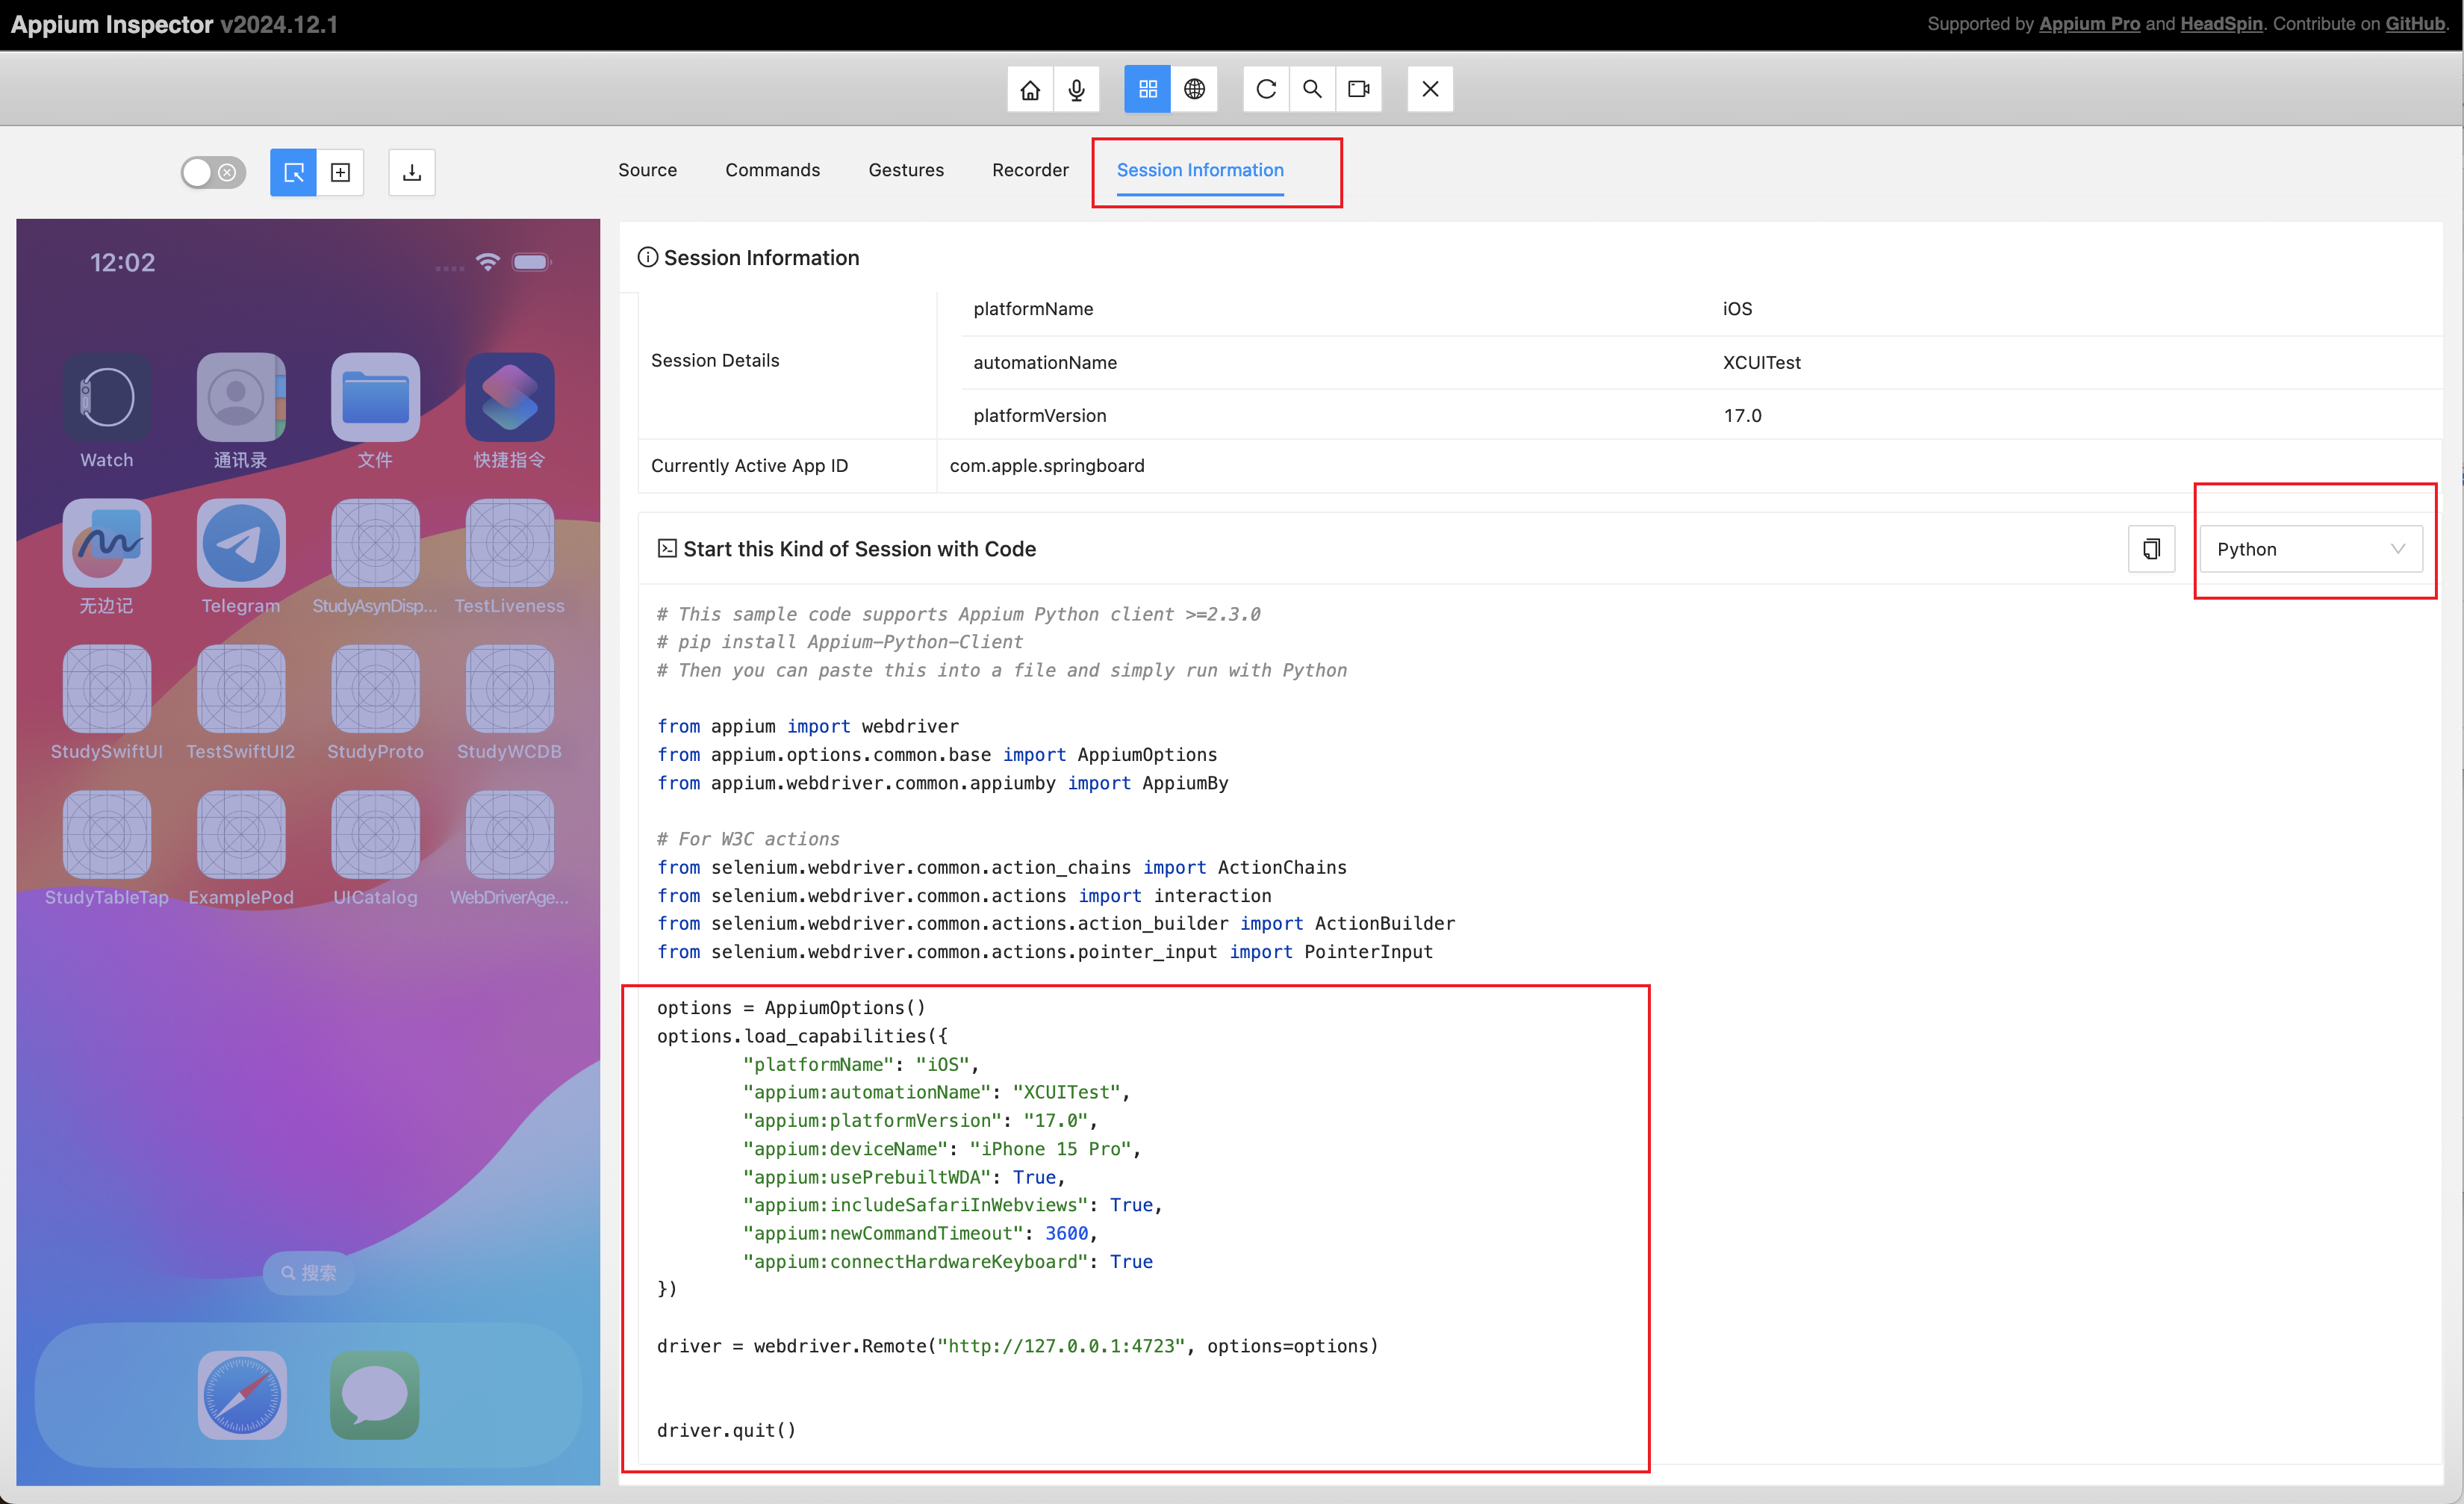
不同的语言可以直接切换,然后就有相关的demo了
1
2
3
4
5
6
7
8
9
10
11
12
13
14
15
16
17
18
19
20
21
22
23
24
25
26
27
28
29
30
# This sample code supports Appium Python client >=2.3.0
# pip install Appium-Python-Client
# Then you can paste this into a file and simply run with Python

from appium import webdriver
from appium.options.common.base import AppiumOptions
from appium.webdriver.common.appiumby import AppiumBy

# For W3C actions
from selenium.webdriver.common.action_chains import ActionChains
from selenium.webdriver.common.actions import interaction
from selenium.webdriver.common.actions.action_builder import ActionBuilder
from selenium.webdriver.common.actions.pointer_input import PointerInput

options = AppiumOptions()
options.load_capabilities({
	"platformName": "iOS",
	"appium:automationName": "XCUITest",
	"appium:platformVersion": "17.0",
	"appium:deviceName": "iPhone 15 Pro",
	"appium:usePrebuiltWDA": True,
	"appium:includeSafariInWebviews": True,
	"appium:newCommandTimeout": 3600,
	"appium:connectHardwareKeyboard": True
})

driver = webdriver.Remote("http://127.0.0.1:4723", options=options)


driver.quit()
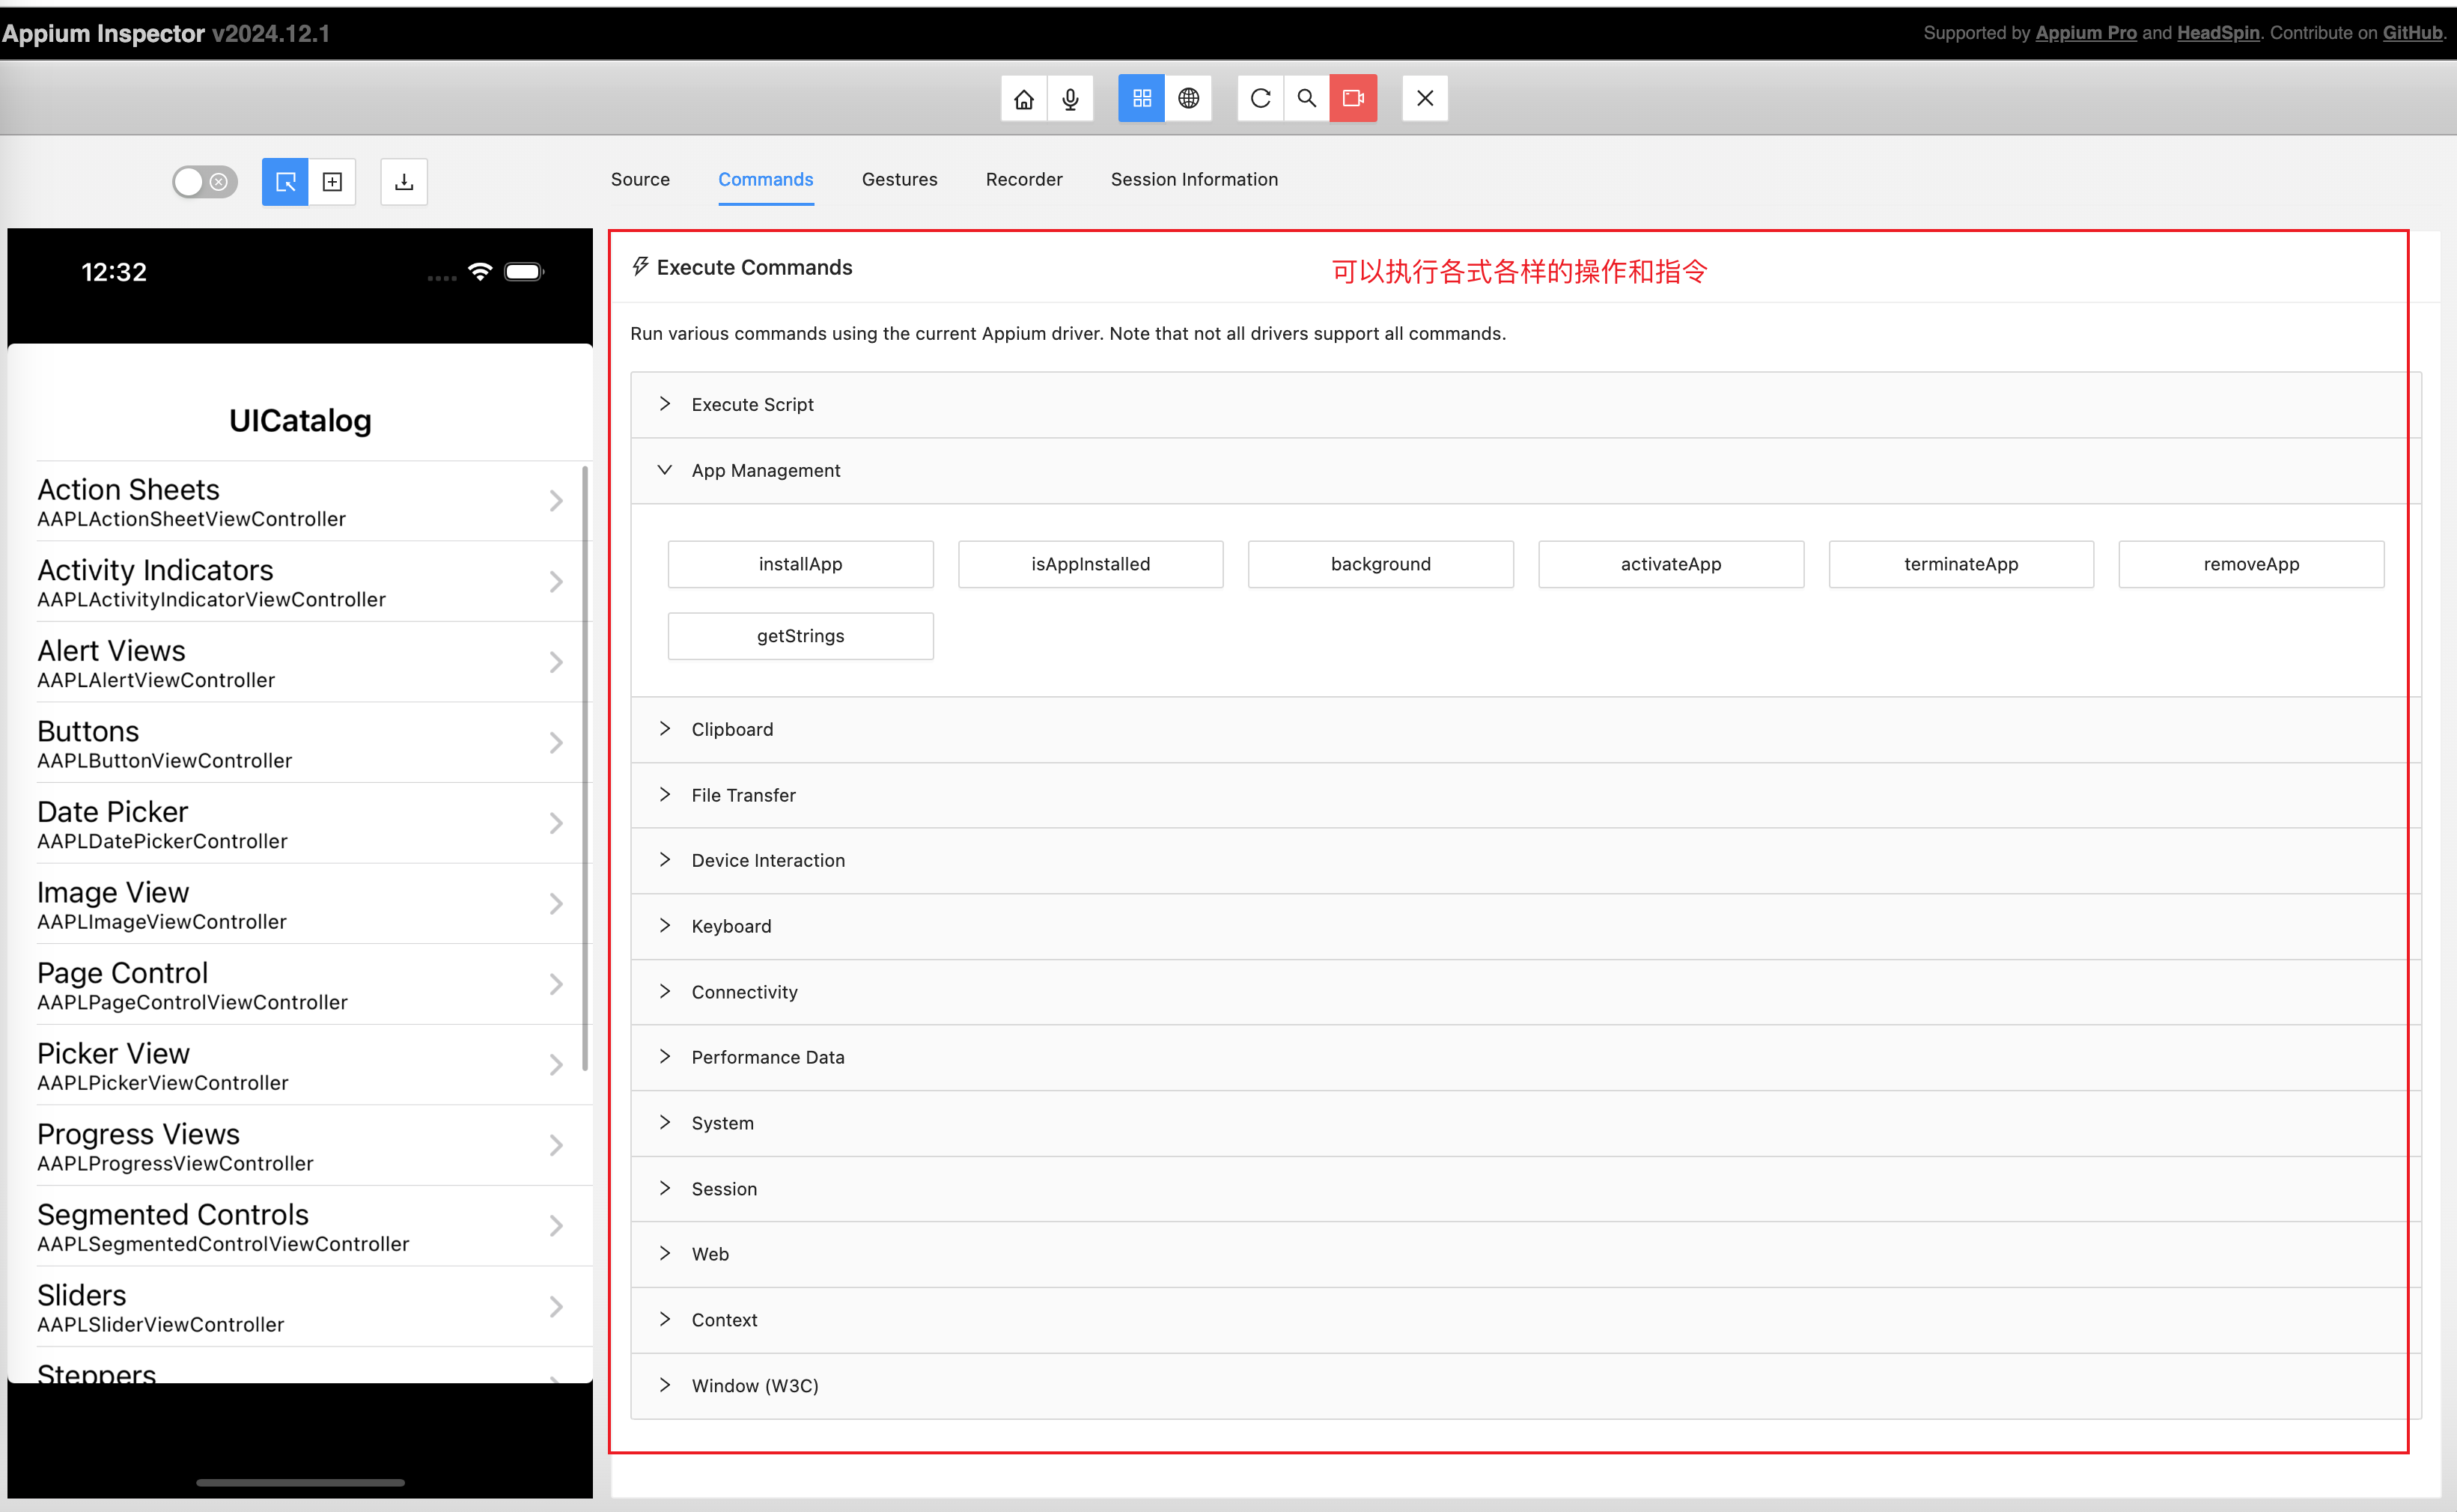
四、操作相关指令及操作录制

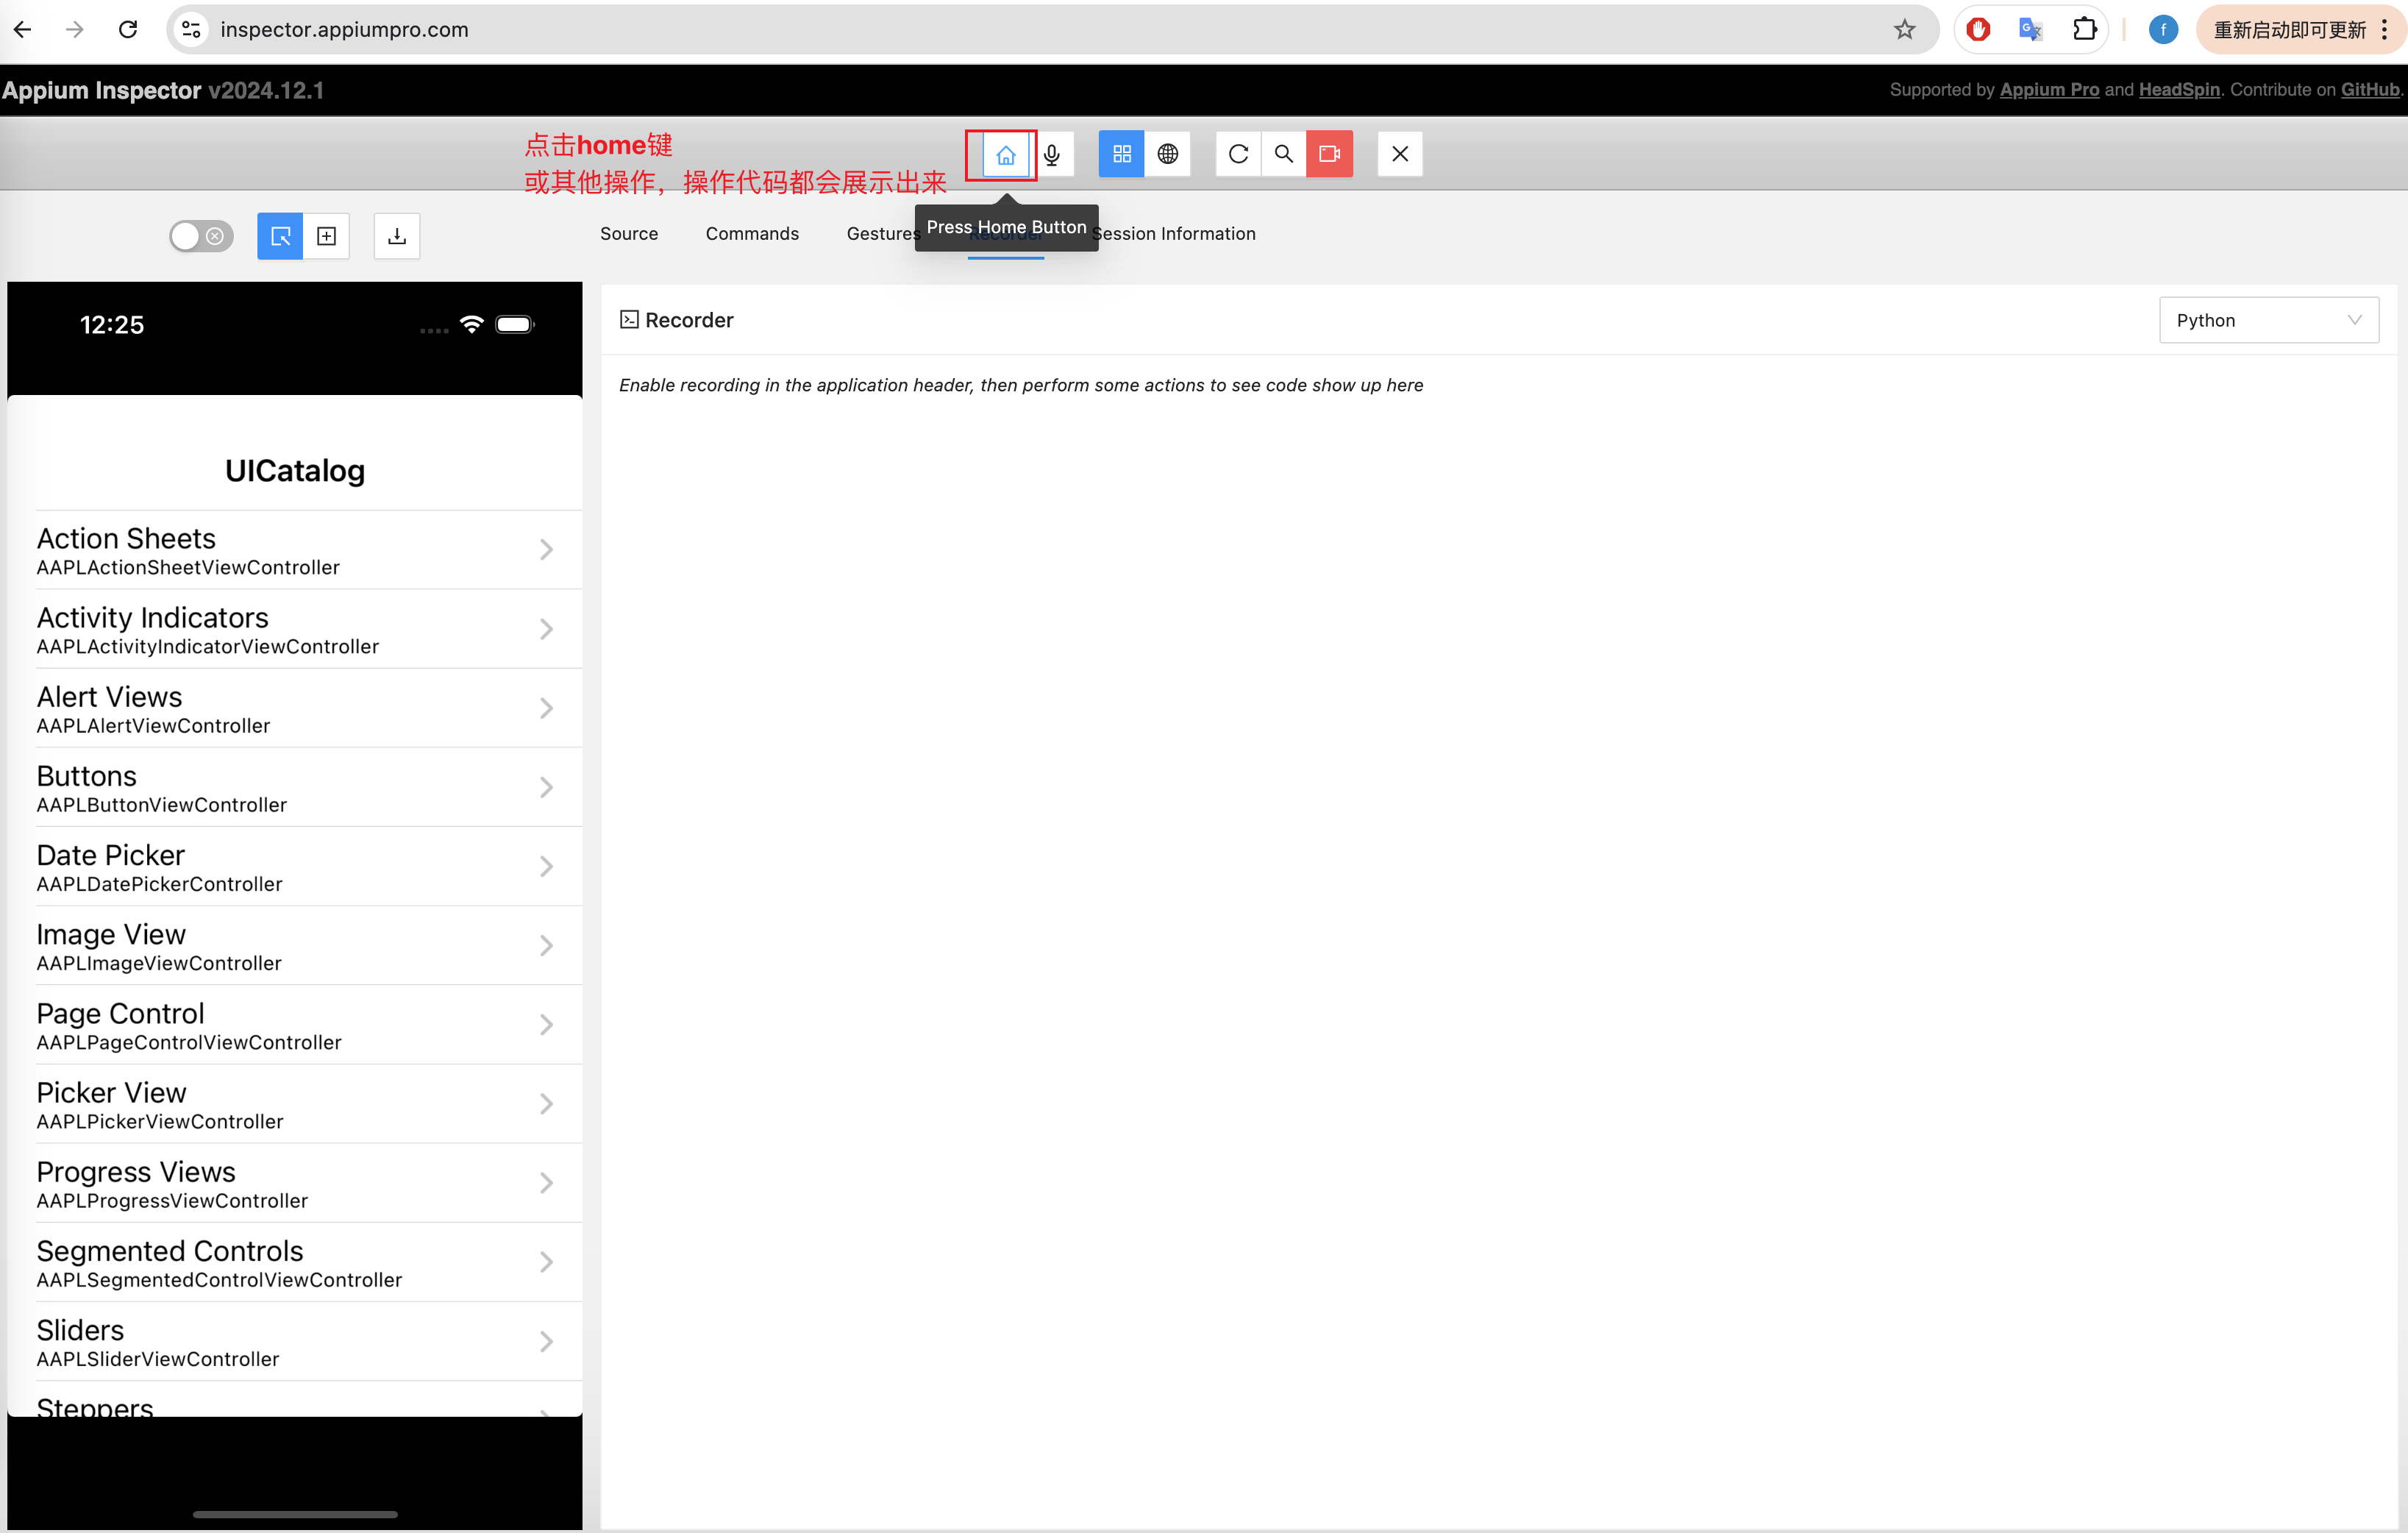
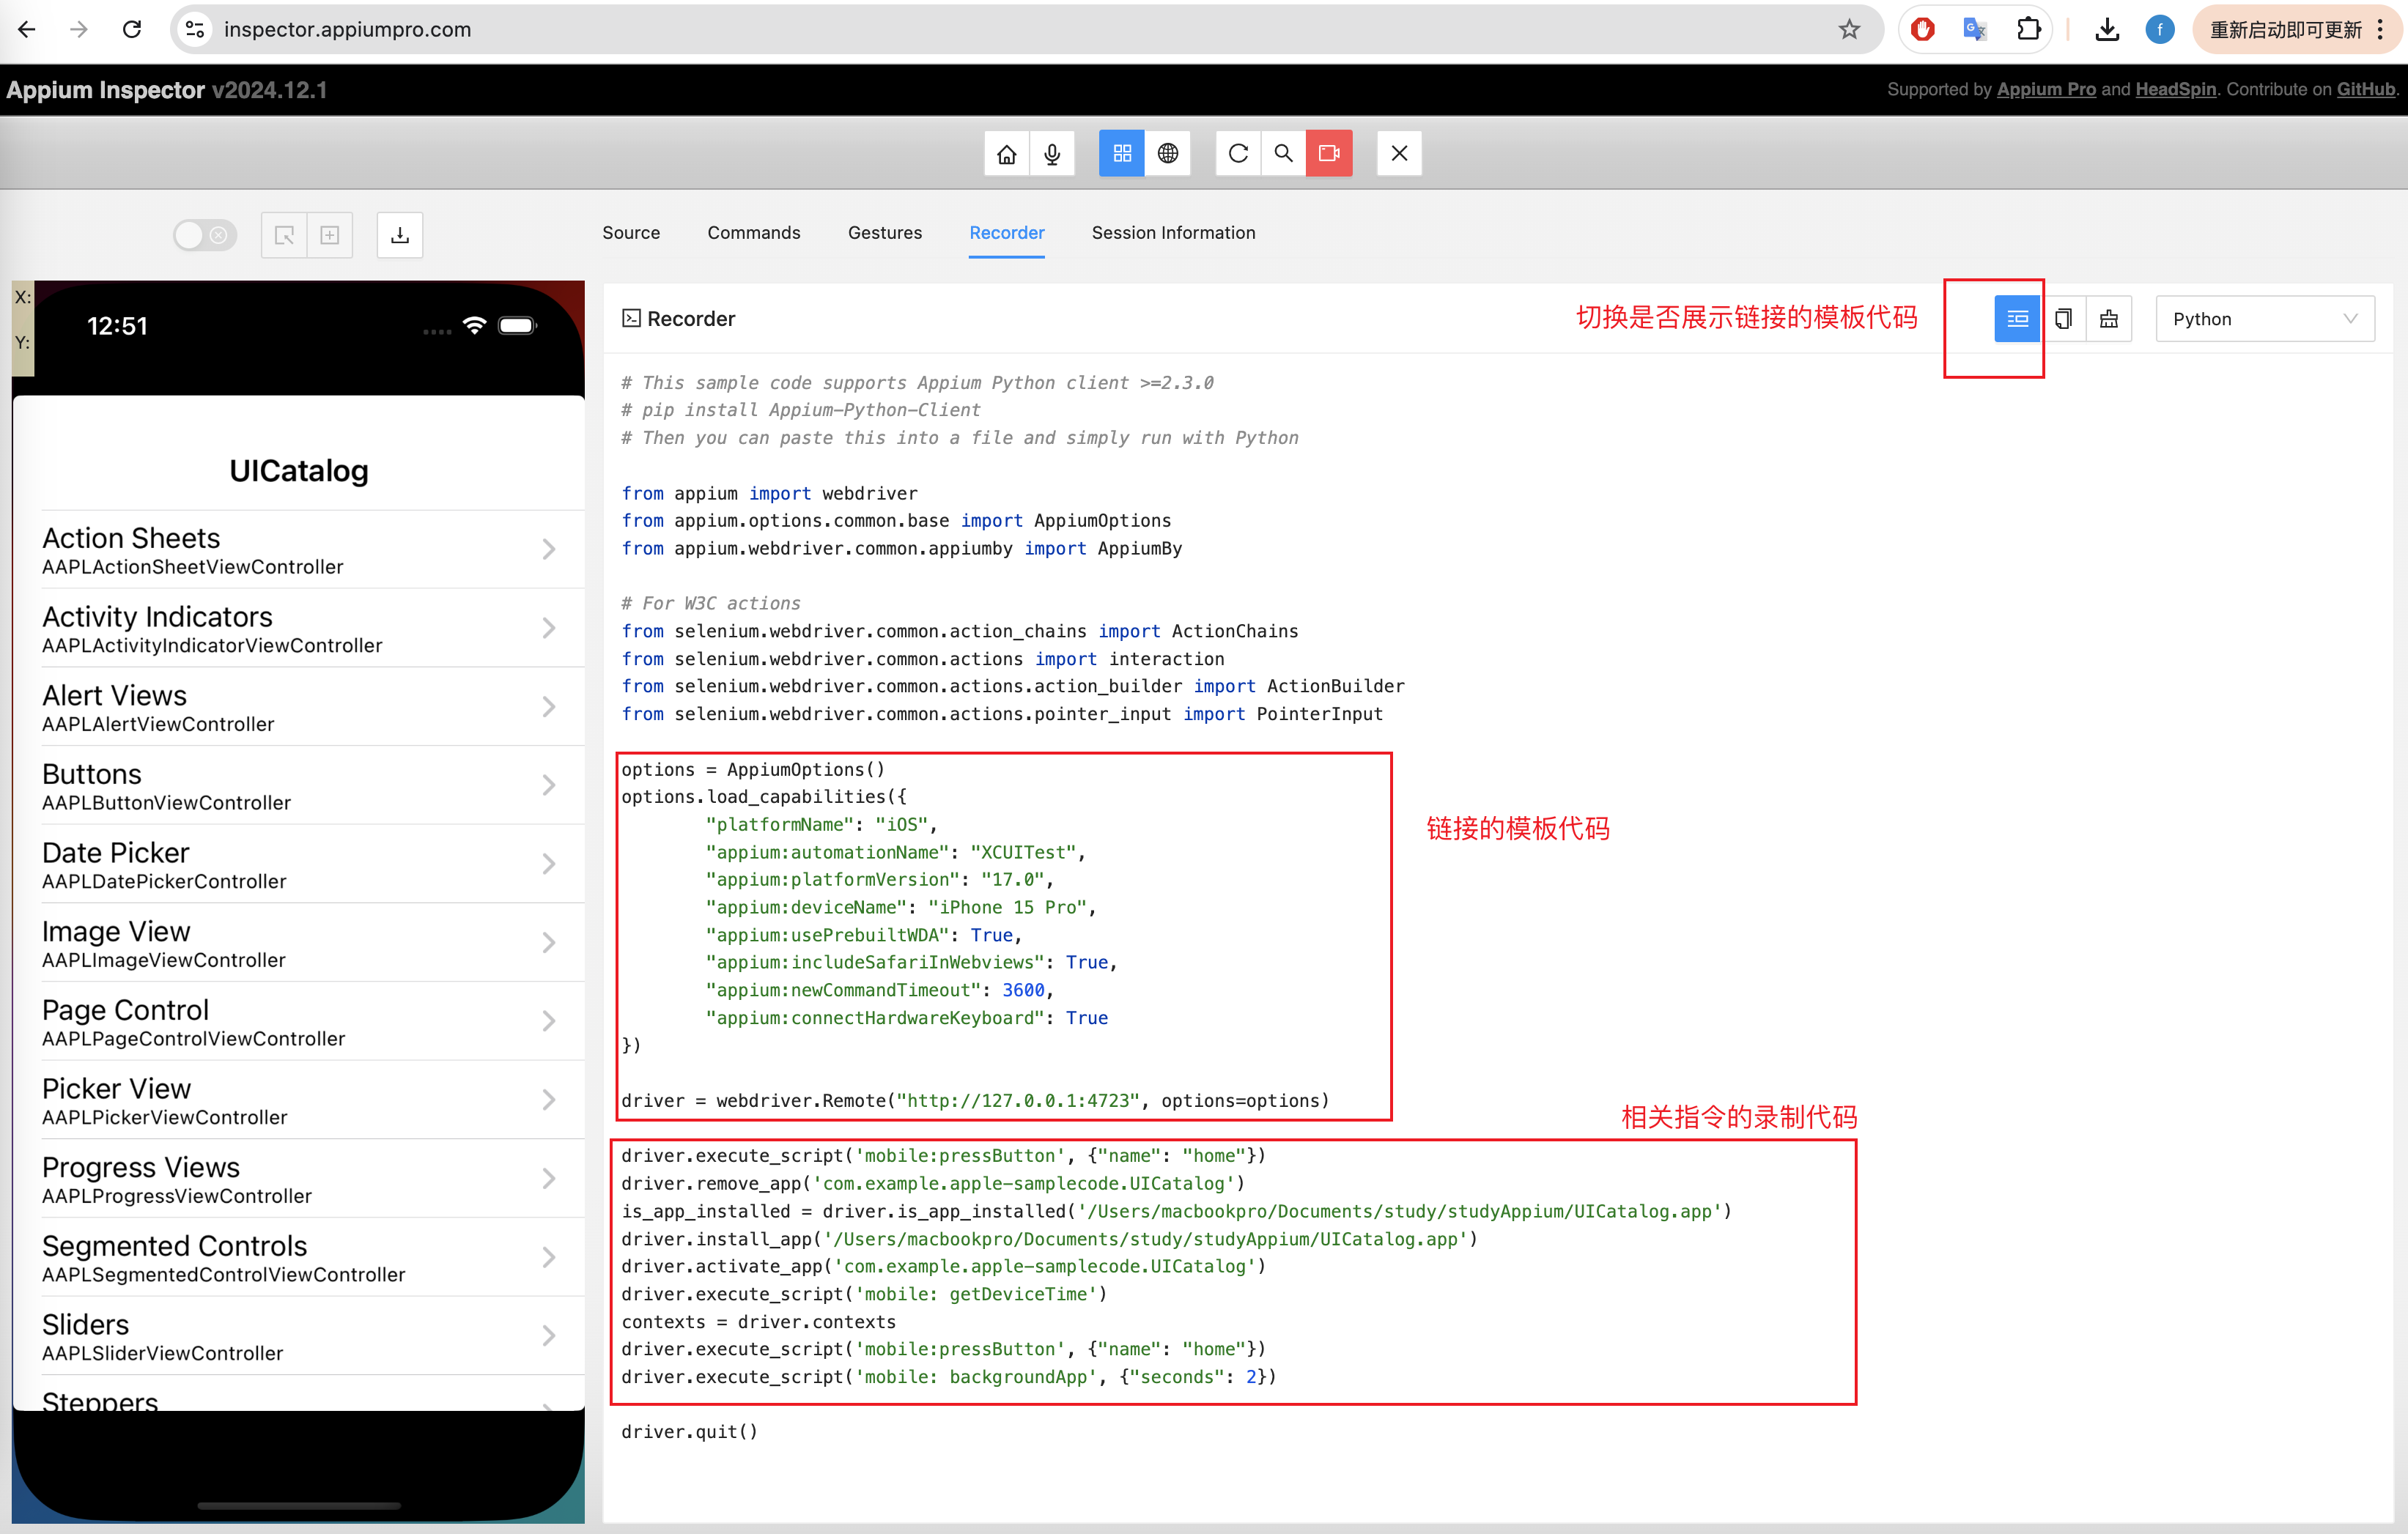 相关操作的录制demo的内容
1
2
3
4
5
6
7
8
9
10
11
12
13
14
15
16
17
18
19
20
21
22
23
24
25
26
27
28
29
30
31
32
33
34
35
36
37
38
39
40
41
42
43
# This sample code supports Appium Python client >=2.3.0
# pip install Appium-Python-Client
# Then you can paste this into a file and simply run with Python

from appium import webdriver
from appium.options.common.base import AppiumOptions
from appium.webdriver.common.appiumby import AppiumBy

# For W3C actions
from selenium.webdriver.common.action_chains import ActionChains
from selenium.webdriver.common.actions import interaction
from selenium.webdriver.common.actions.action_builder import ActionBuilder
from selenium.webdriver.common.actions.pointer_input import PointerInput

options = AppiumOptions()
options.load_capabilities({
	"platformName": "iOS",
	"appium:automationName": "XCUITest",
	"appium:platformVersion": "17.0",
	"appium:deviceName": "iPhone 15 Pro",
	"appium:usePrebuiltWDA": True,
	"appium:includeSafariInWebviews": True,
	"appium:newCommandTimeout": 3600,
	"appium:connectHardwareKeyboard": True
})

driver = webdriver.Remote("http://127.0.0.1:4723", options=options)
# 进入home
driver.execute_script('mobile:pressButton', {"name": "home"})
# 获取判断是否安装APP
is_app_installed = driver.is_app_installed('com.example.apple-samplecode.UICatalog')
# 安装APP
driver.install_app('/Users/macbookpro/Documents/study/studyAppium/UICatalog.app')
# 激活APP
driver.activate_app('com.example.apple-samplecode.UICatalog')
# 进入后台
driver.execute_script('mobile: backgroundApp', {"seconds": 2})
# 杀掉APP进程
driver.terminate_app('com.example.apple-samplecode.UICatalog')
# 移除APP
driver.remove_app('com.example.apple-samplecode.UICatalog')

driver.quit()
五、操作APP
5.0 获取系统弹出并操作
1
2
3
4
5
6
7
8
9
10
11
12
13
# 比如推送弹出,网络权限弹窗等各种弹窗
alert = driver.switch_to.alert
if alert:
    alert.accept()  # 点击 OK 或确认

# 截屏成base64字符串
screenshot_base64 = driver.get_screenshot_as_base64()
screenshot_bytes = driver.get_screenshot_as_png()
win_pos = driver.get_window_position()
win_size = driver.get_window_size()
# 查看元素结构
page_source = driver.page_source
logging.error(f"page_source {page_source}")
5.1 通过id获取元素
1
2
3
4
5
6
# 通过id查找元素,前提是要在代码里设置了ACCESSIBILITY_ID
# swift源码里 let loginButton = UIButton()
# swift源码里 loginButton.accessibilityIdentifier = "loginButton"
loginBtn = driver.find_element(By.ACCESSIBILITY_ID, "loginButton")
# 点击操作
loginBtn.click()
5.2 通过path获取元素
1
2
3
4
5
6
7
8
9
10
11
12
13
14
15
16
17
18
19
20
21
22
# 通过path的方式获取,path使用inspector的source面板里获取
loginBtn = WebDriverWait(driver, 20).until(
    EC.element_to_be_clickable((By.XPATH, '//XCUIElementTypeButton[@name="登录"]'))
)
loginBtn.click()

nameInput = WebDriverWait(driver, 20).until(
    EC.element_to_be_clickable((By.XPATH, '//XCUIElementTypeTextField[@value="请输入姓名"]'))
)
nameInput.send_keys("fobe")

slide_item = WebDriverWait(driver, 20).until(
    EC.element_to_be_clickable((By.XPATH, '//XCUIElementTypeOther[@name="DEFAULT" and @label="DEFAULT"]'))
)
# 获取元素的位置
print(f"slide_item.location.x: {slide_item.location['x']}")
print(f"slide_item.location.y: {slide_item.location['y']}")
print(f"slide_item.size.width: {slide_item.size['width']}")
print(f"slide_item.size.height: {slide_item.size['height']}")
offsetx = 50
# slide_item水平方向滑动100的距离
ActionChains(driver).click_and_hold(slide_item).move_by_offset(offsetx, 0).release().perform()
5.3 滑动的各种实现
5.3.1 使用ActionChains的move_by_offset一次性移动到位
1
2
3
4
5
6
from appium import webdriver
from appium.webdriver.common.appiumby import AppiumBy
from selenium.webdriver.common.action_chains import ActionChains

slider = driver.find_element(AppiumBy.ACCESSIBILITY_ID, 'slider')
ActionChains(driver).click_and_hold(slider).move_by_offset(offsetx, 0).release().perform()
5.3.2 使用ActionChains的move_to_location多次移动
1
2
3
4
5
6
7
8
9
10
11
12
13
14
15
16
17
18
19
20
21
22
23
24
25
26
27
28
29
30
31
32
33
34
35
36
37
38
39
40
41
42
from appium import webdriver
from appium.webdriver.common.appiumby import AppiumBy
from selenium.webdriver.common.actions.action_builder import ActionBuilder
from selenium.webdriver.common.actions.interaction import POINTER_TOUCH
from selenium.webdriver.common.actions.pointer_input import PointerInput
import time

# 定位滑块元素
slider = driver.find_element(AppiumBy.ACCESSIBILITY_ID, 'slider')
# 获取滑块的初始位置和大小
slider_location = slider.location
slider_size = slider.size

# 计算滑块的起始点和目标点
start_x = slider_location['x'] + slider_size['width'] / 2
start_y = slider_location['y'] + slider_size['height'] / 2
end_x = start_x + 200  # 根据需要滑动的距离调整
end_y = start_y

# 创建 PointerInput 对象
pointer_input = PointerInput(POINTER_TOUCH, "touch")
# 创建 ActionBuilder 对象
action_builder = ActionBuilder(driver, mouse=pointer_input)
# 定义动作链
actions = action_builder.pointer_action
# 按下滑块
actions.move_to_location(start_x, start_y).pointer_down()

# 平滑移动滑块
steps = 50  # 将滑动分为 50 步
step_x = (end_x - start_x) / steps
step_y = (end_y - start_y) / steps

for i in range(steps):
    actions.move_to_location(start_x + step_x * (i + 1), start_y + step_y * (i + 1))
    time.sleep(0.01)  # 添加延迟以模拟平滑移动

# 释放滑块
actions.pointer_up()

# 执行动作
action_builder.perform()
针对scrollview、tableView、slider等各种可以滑动的内容的滑动
1
2
3
4
5
6
7
8
9
10
11
12
13
14
15
16
17
 pointer_input = PointerInput(POINTER_TOUCH, "touch")

# 创建 ActionBuilder 对象
action_builder = ActionBuilder(driver, mouse=pointer_input)

# 执行 swipe 操作
actions = action_builder.pointer_action
actions.move_to_location(win_width, win_height/2).pointer_down()
actions.move_to_location(0, win_height/2).pointer_up()
action_builder.perform()

# 简写的方式
action_builder2 = ActionBuilder(driver, mouse=PointerInput(POINTER_TOUCH, "touch"))
模拟手指按压在(x1,y1)点,滑动到(x2,y2)点后抬起手指
action_builder2.pointer_action.move_to_location(x1, y1).pointer_down()
action_builder2.pointer_action.move_to_location(x2, y2).pointer_up()
action_builder.perform()
This post is licensed under CC BY 4.0 by the author.